
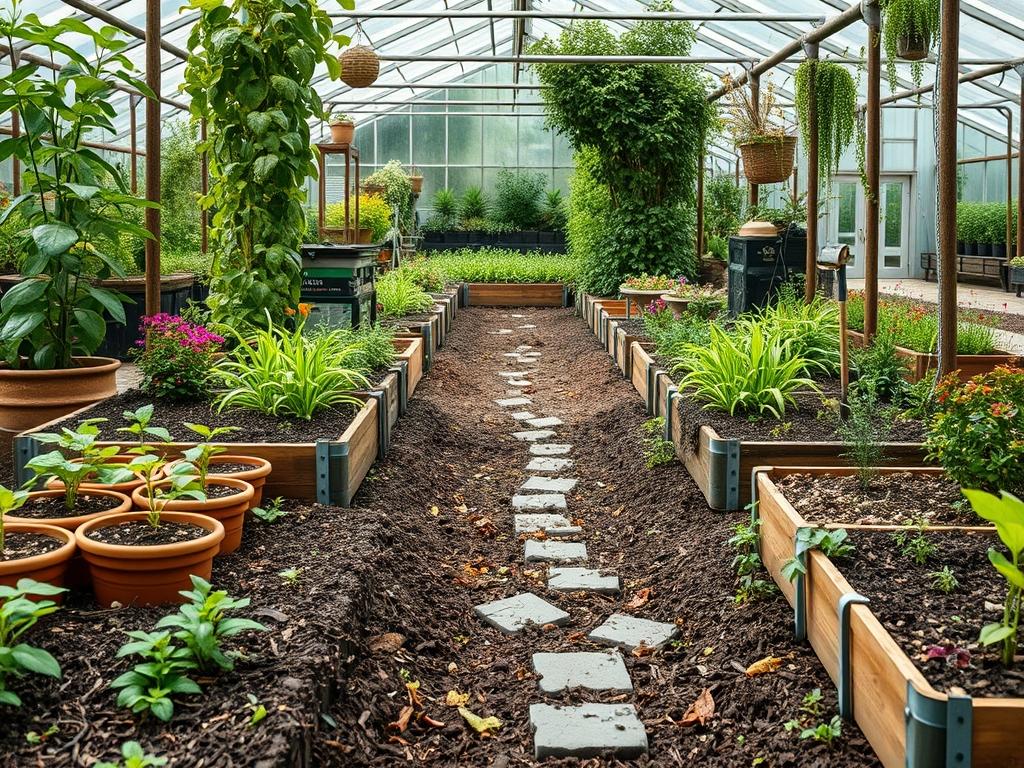
Traditional landscaping often relies on the repetitive application of shredded hardwood, pine bark, or dyed wood chips to suppress weeds and retain moisture. While these organic materials provide a temporary solution, they represent a recurring cost and a persistent maintenance cycle that many homeowners find taxing. In the professional sphere of landscape architecture, we are increasingly turning toward the concept of living mulch to solve these aesthetic and functional challenges. By utilizing low-growing, spreading plants as a biological carpet, we create a self-sustaining ecosystem that offers superior curb appeal and robust outdoor functionality. This approach aligns with permaculture principles by treating the soil as a living entity rather than a static medium. The shift from inert mulch to living ground covers addresses climate considerations such as excessive heat reflection and runoff, ensuring that the landscape remains resilient in the face of shifting environmental stressors.
As a senior consultant, I have observed that the primary goal of any high-end landscape design is to create a sense of permanence and intentionality. Standard wood mulch eventually breaks down, leaving bare spots that invite opportunistic weeds. In contrast, the integration of living covers creates a seamless transition between various garden rooms, pathways, and structural elements. This methodology transforms the forest floor or the domestic flower bed into a multi-layered masterpiece where every square inch of earth is occupied by a productive or ornamental species. The result is a landscape that feels established and lush, significantly increasing property value while reducing the carbon footprint associated with hauling and spreading tons of wood waste each spring.
Landscape Design Principles
Applying living mulch requires a sophisticated understanding of spatial relationships and visual weight. One of the foundational principles we use is the creation of elevation layers. Instead of looking at a garden as a flat plane, we design in three dimensions. The living mulch forms the lowest tier, sitting just above the Soil Surface. Above this, we place herbaceous perennials, followed by shrubs, and finally a canopy of trees. This vertical stacking maximizes the photosynthetic potential of the site and protects the soil from the kinetic energy of heavy rainfall. We use symmetry to guide the eye toward focal points, such as a high-end Cast Stone Fountain or a specimen Japanese Maple, while the living mulch provides a uniform base that prevents the scene from looking cluttered.
Walkways and pedestrian circulation are critical components when planning these environments. We often use Flagstone or Pennsylvania Bluestone set into the living mulch to create a navigable path that does not require heavy infrastructure. The contrast between the rigid, gray stone and the soft, green texture of the plant material achieves a visual balance that is difficult to replicate with gravel or mulch. Furthermore, irrigation planning must be more precise when using living covers. Instead of a blanket application of water, we design zones that account for the differing transpiration rates of the ground cover and the specimen plants. Properly mapped irrigation lines ensure that the primary root zones receive deep hydration while the living mulch maintains a healthy microclimate at the surface.
Plant and Material Selection
Choosing the right species for a living mulch requires an analysis of site-specific data including sunlight hours and soil pH. The goal is to select plants that are vigorous enough to outcompete weeds but not so aggressive that they choke out the primary ornamental plantings.
| Plant Type | Sun Exposure | Soil Needs | Water Demand | Growth Speed | Maintenance Level |
| :— | :— | :— | :— | :— | :— |
| White Clover | Full Sun to Part Shade | Low Fertility | Moderate | Fast | Low |
| Creeping Thyme | Full Sun | Well-Drained/Sandy | Low | Moderate | Low |
| Wild Strawberry | Part Shade to Shade | Organic-Rich | Moderate | Fast | Medium |
| Green-and-Gold | Part Shade | Loamy | Moderate | Moderate | Low |
| Sedum Acre | Full Sun | Poor/Rocky | Low | Fast | Low |
| Sweet Woodruff | Full Shade | Moist/Humus | High | Moderate | Medium |
The use of Nitrogen-fixing species like Clover contributes to the long-term health of the soil by drawing atmospheric nitrogen into the root system. This reduces the need for synthetic fertilizers, which can lead to nutrient runoff and compaction issues. In areas of high foot traffic, we recommend tougher species such as Creeping Mazus or Thyme, as these can withstand occasional compression without losing their structural integrity.
Implementation Strategy
The successful installation of a living mulch system begins with rigorous site preparation. Unlike traditional mulching, you cannot simply throw these plants over untilled ground. We start with grading to ensure that the site has a 2 percent slope away from building foundations. This prevents water from pooling and protects the structural integrity of the home. Once the grading is established, we use a Power Tiller or a Broadfork to aerate the soil to a depth of 8 inches. Incorporating 3 inches of high-quality Compost or Aged Manure provides the initial nutrient boost necessary for the ground cover to establish dominance quickly.
Edging is the next critical step. We prefer using Heavy-Duty Steel Edging or Concrete Pavers to create a clean break between the living mulch and the lawn or driveway. Without a firm border, many living mulches will creep into areas where they are not wanted. Planting should be done in a triangular offset pattern rather than straight rows. This ensures that as the plants grow, they fill the gaps more efficiently, leaving no light for weed seeds to germinate. During the first 60 days, the area should be monitored for moisture levels. We often recommend a thin layer of Rice Hulls or Chopped Straw to protect the young plugs while they are rooting. This temporary mulch will decompose just as the living mulch achieves full coverage.
Common Landscaping Failures
The most frequent mistake in living mulch systems is improper drainage management. If the soil becomes oversaturated, the roots of the ground cover will rot, leading to unsightly patches of brown decay. This creates an entry point for invasive weeds and fungus. Another common failure is root overcrowding. When planting a multi-layered landscape, the architect must account for the mature width of every shrub and tree. If the overstory is too dense, it will starve the living mulch of light, causing it to thin out and lose its effectiveness.
Soil compaction is another silent killer. During the construction phase, heavy machinery often packs the earth so tightly that the micro-pores in the soil collapse. This prevents the exchange of gases and the downward movement of water. We always recommend a soil penetrometer test to ensure the Bulk Density is within acceptable limits before planting. Finally, irrigation inefficiencies occur when homeowners use standard spray heads that over-water the surface while leaving the deep roots of trees thirsty. A sophisticated Drip Irrigation System with emitters spaced at 12-inch intervals is the professional standard for these complex, living systems.
Seasonal Maintenance
Landscape management is a year-round commitment that changes with the cycles of the sun. In spring, the primary task is thinning and dividing. Because many living mulches are vigorous, they may begin to encroach on the crowns of perennials. Using a Sharp Hand Trowel or Pruning Shears, we remove the excess growth to maintain the intended design geometry. This is also the time to apply a light foliar spray of Seaweed Extract to stimulate early-season growth.
During the heat of summer, the focus shifts to moisture management. While living mulches are excellent at coolly shading the soil, a prolonged drought can stress even the hardiest species. We monitor the leaf turgidity of the Ground Cover to determine if supplemental watering is required. Autumn maintenance involves clearing debris. While it is beneficial to leave a small amount of leaf litter for the local insect population, a thick layer of heavy oak leaves can smother the living mulch. We recommend using a Leaf Blower on a low setting or a Soft Rake to remove large debris. In winter, most living mulches go into dormancy. This is the period to evaluate the structural “bones” of the landscape. Without the greenery, you can clearly see the grading and the hardscape. It is the perfect time to plan any topographical adjustments for the following year.
Professional Landscaping FAQ
How does living mulch suppress weeds compared to wood chips?
Living mulch uses biological competition for light, space, and nutrients. Once the canopy of the Ground Cover closes, it prevents sunlight from reaching dormant weed seeds, effectively neutralizing them.
Is living mulch more expensive than traditional mulch?
The initial investment in Plant Plugs is higher than a load of wood chips. However, because it does not need to be replaced every year, it becomes the more cost-effective solution within three seasons.
Can I use living mulch on steep slopes or embankments?
Yes, it is actually superior for erosion control. The fibrous root systems of plants like Creeping Juniper or Vinca lock the soil in place more effectively than loose wood chips or gravel.
Will living mulch attract more pests to my foundation?
Actually, a diverse living mulch creates a habitat for predatory insects like Ladybugs and Ground Beetles. These natural predators keep the populations of damaging pests in check through biological balance.
How do I handle fertilization in a living mulch system?
Most living mulches are chosen for their ability to thrive in average soil. We recommend a once-yearly spring application of Liquid Fish Emulsion to support both the ground cover and the primary ornamental plants.