
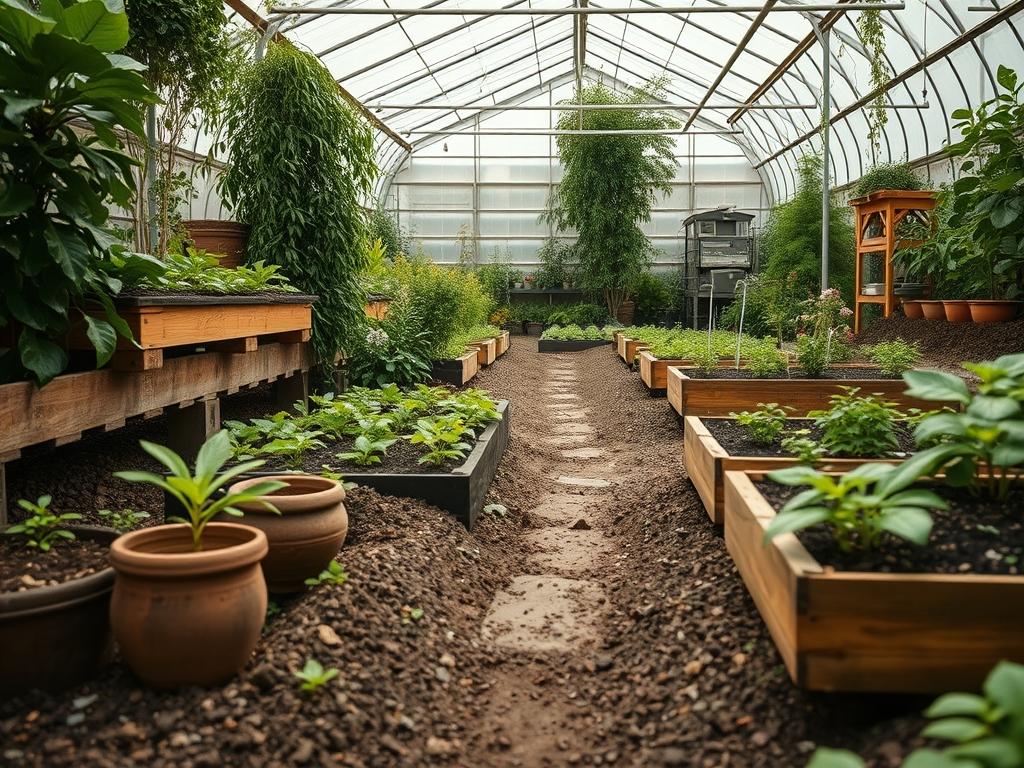
The success of a professional landscape design relies heavily on the structural integrity and biological vitality of the soil. Traditionally, site preparation involved aggressive tilling and excavation to create a blank canvas, but modern landscape architecture is shifting toward No-Dig Garden Foundations. This method acknowledges that soil is not merely a physical substrate but a complex, living matrix. When we disrupt this matrix with heavy machinery or manual tilling, we destroy the intricate web of mycorrhizal fungi that acts as a life support system for plants. By building soil upward rather than digging downward, we preserve the microbial architecture that facilitates nutrient uptake, enhances water retention, and ensures the long term health of the outdoor environment.
From a functional perspective, no-dig approaches address one of the most significant challenges in landscaping: soil compaction and erosion. When soil is turned, its natural structure is broken, leading to a loss of porosity. This often results in poor drainage and high runoff, which can damage hardscaping and undermine the stability of retaining walls. In contrast, a no-dig foundation utilizes organic layers to suppress weeds and build tilth naturally. This approach significantly boosts curb appeal by fostering resilient, lush foliage that requires fewer chemical interventions. It creates a landscape that is both aesthetically pleasing and ecologically sound, aligning with contemporary goals of sustainability and low-impact development.
Landscape Design Principles
In professional landscape architecture, no-dig foundations offer a unique opportunity to manipulate elevation and create visual interest without the heavy costs of traditional grading. By utilizing sheet mulching techniques, we can build gentle mounds and tiered layers that serve as natural focal points. Symmetry and visual balance are achieved through the strategic placement of organic materials, which eventually settle into a rich, dark base that highlights the colors of the chosen flora. The focus shifts from fighting the existing terrain to enhancing it through the addition of biomass.
Focal points in a no-dig landscape often center around healthy, established trees or high impact plant groupings. Since we are not digging near root zones, we avoid the risk of damaging the existing root systems of large specimens. This preservation is critical for maintaining the structural integrity of the site. Furthermore, the use of walkways and edging becomes even more important in a no-dig system. Defined paths made of crushed stone or permeable pavers help direct foot traffic, preventing the compaction of the delicate fungal networks we are trying to protect. Irrigation planning must also be integrated into the design layers; soaker hoses or drip lines are typically placed beneath the final layer of mulch to provide direct hydration to the root zone while minimizing evaporation.
The layering process itself contributes to the elevation layers of the garden. We start with a base of brown cardboard or heavy builders paper to suppress existing vegetation. Above this, we add varying depths of organic matter. This vertical growth of the garden bed adds a sense of luxury and intentionality to the design. It allows for a more dynamic use of space, where the garden feels like a rising, living sculpture rather than a flat, two dimensional installation.
Plant and Material Selection
| Plant Type | Sun Exposure | Soil Needs | Water Demand | Growth Speed | Maintenance Level |
| :— | :— | :— | :— | :— | :— |
| Echinacea purpurea | Full Sun | Well-drained | Moderate | Medium | Low |
| Lavandula angustifolia | Full Sun | Sandy/Lean | Low | Medium | Moderate |
| Hostas | Full/Partial Shade | Rich/Humus | High | Fast | Low |
| Panicum virgatum | Full Sun | Adaptable | Low | Fast | Low |
| Acer palmatum | Partial Shade | Slightly Acidic | Moderate | Slow | Moderate |
| Sarcococca confusa | Deep Shade | Moist/Rich | Moderate | Slow | Low |
Implementation Strategy
Implementing a no-dig foundation requires precision and a clear sequence of operations to ensure the longevity of the landscape. The process begins with a thorough site analysis to determine the existing drainage patterns. Once the layout is marked using landscape marking paint, any high weeds should be mowed to the ground, leaving the clippings in place to add nitrogen. Unlike traditional methods, we do not remove the sod; the goal is to let it decompose and feed the soil.
The first structural layer is the suppression barrier. Use large sheets of corrugated cardboard, ensuring that they overlap by at least 6 inches to prevent light from reaching the weeds below. This barrier must be thoroughly soaked with a garden hose before moving to the next step. Following this, apply a 2 to 3 inch layer of high quality compost or aged manure. This layer serves as the primary planting medium and the initial source of nutrients for the fungal network.
For the final aesthetic and protective layer, apply 3 inches of hardwood mulch or pine bark. This depth is crucial for moisture retention and temperature regulation. When it is time to plant, simply pull back the mulch, cut a small “X” in the cardboard, and place the root ball of your perennial or shrub directly into the compost layer. This surgical approach to planting leaves 95 percent of the soil surface undisturbed. To finish, install aluminum edging or stone borders to create clean lines and prevent the mulch from migrating into walkways or lawn areas.
Common Landscaping Failures
One of the most frequent mistakes in garden planning is the failure to account for drainage. Even in a no-dig system, water must have a place to go. If the ground is naturally heavy clay, building a no-dig bed without addressing the slope can lead to water pooling at the base, effectively drowning the fungal hyphae and causing root rot. Proper grading of the surrounding area is still necessary to ensure that runoff moves away from the home foundation and the primary garden beds.
Another common failure is root overcrowding. Because no-dig beds are so nutrient dense, plants often grow faster than anticipated. Landscape architects must adhere to professional spacing guidelines, accounting for the mature width of the species. For example, a Baptisia australis may look small in a 1 gallon pot, but it will eventually require a 3 foot diameter space. Planting too closely leads to poor air circulation, which invites fungal diseases like powdery mildew, despite the healthy soil below.
Soil compaction from foot traffic or heavy garden furniture is another silent killer of fungal networks. Once a no-dig bed is established, it should never be stepped on. The weight of a human can collapse the delicate air pockets and mycelial strands within the top 6 inches of the soil. Additionally, over-mulching is an issue. Applying more than 4 inches of mulch can create an anaerobic environment where oxygen cannot reach the roots, leading to a decline in plant vigor.
Seasonal Maintenance
Managing a no-dig landscape requires a shift in seasonal habits. In the spring, the primary task is to inspect the integrity of the mulch layer. As the organic matter decomposes, it will settle. You may need to add a light top dressing of compost to replenish nutrients, followed by a fresh 1 inch layer of wood chips to maintain the aesthetic appeal. This is also the time to check the irrigation system for any leaks or clogged emitters before the summer heat arrives.
Summer maintenance focuses on water management and deadheading. Because no-dig foundations retain moisture more efficiently, you may find that your irrigation schedule can be reduced. Use a moisture meter to check the soil before watering. During autumn, instead of raking the garden clean, leave the fallen leaves in the beds. Leaves are a primary food source for the worms and fungi that build soil structure. You can lightly shred them with a mower first to prevent them from matting and blocking moisture.
Winter is the season for structural observation and tool maintenance. It is a good time to prune deciduous trees while they are dormant. Ensure that the soil remains covered; bare soil is vulnerable to erosion from winter rains and UV degradation. If any areas have become exposed, cover them with straw or additional mulch. This year-round protection ensures that the fungal network remains active and insulated even in freezing temperatures.
Professional Landscaping FAQ
How does no-dig benefit the fungal network?
Tilling physically severs the mycelial strands of mycorrhizal fungi. No-dig methods keep these networks intact, allowing them to transport water and minerals to plant roots in exchange for sugars, creating a highly efficient, natural nutrient delivery system within the landscape.
Can I use no-dig methods on steep slopes?
Yes, but it requires stabilization. Use check dams or timber retaining walls to hold the organic layers in place. The cardboard and mulch layers help prevent surface erosion, while the fungal networks eventually knit the soil together for better stability.
Will the cardboard attract pests like termites?
When cardboard is kept moist and covered by compost, it decomposes rapidly, usually within six months. While it provides a carbon source, it rarely attracts termites unless it is placed directly against the wooden structural elements of a home or building.
How deep should my compost layer be?
A professional standard is 2 to 4 inches of high quality compost. This provides enough depth for small starts to establish roots while the cardboard underneath softens, eventually allowing the roots to penetrate into the native soil below.
Is no-dig landscaping more expensive than traditional methods?
Initially, the cost of bulk compost and mulch may be higher than simple tilling. However, the long term savings are significant. You will spend less on fertilizers, weed control, and replacement plants, making it a more cost effective solution over time.