
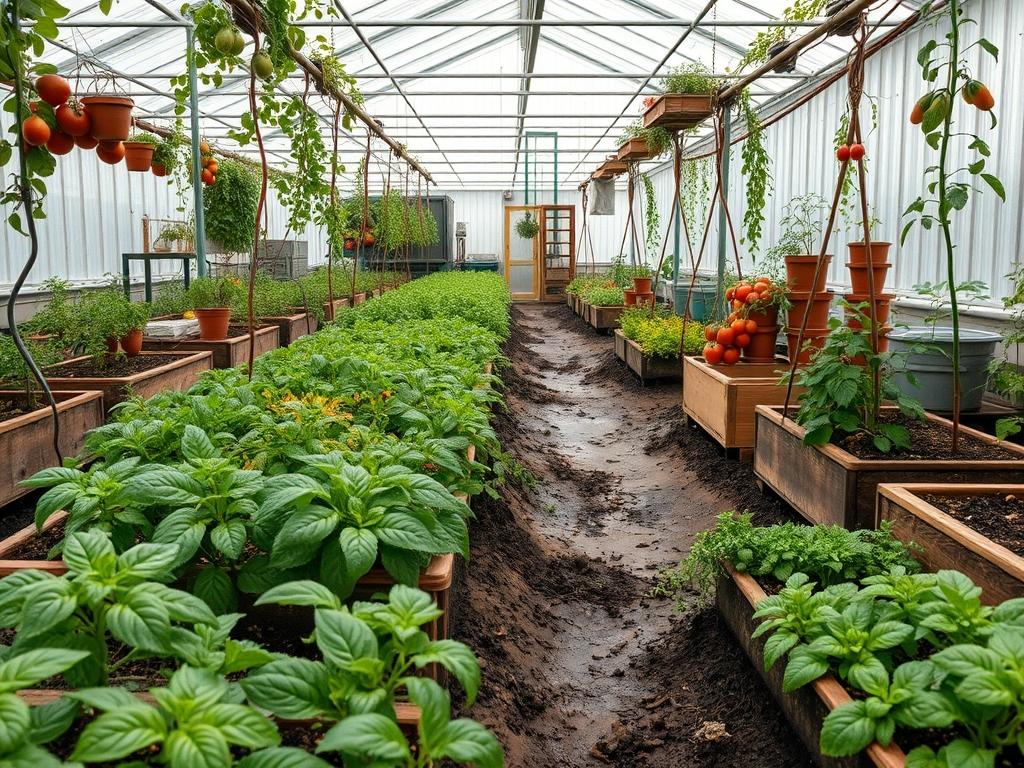
Achieving a high-yielding, aesthetically pleasing vegetable garden begins with a rigorous site analysis and a profound commitment to soil health. For the professional landscape architect, integrating edible crops into a residential or commercial plan requires more than simple placement. It demands an understanding of how soil structure affects both the structural integrity of the garden and the ultimate productivity of the plants. The primary challenge in residential landscapes often lies in balancing the intense nutrient requirements of heavy feeders with the clean, curated look of a formal garden. When clients seek the best soil for tomatoes, they are rarely just asking about dirt. They are asking for a biological engine that sustains growth, resists disease, and enhances the overall curb appeal of the outdoor environment. We must view the garden as a functional ecosystem where drainage, elevation, and irrigation intersect to produce superior results.
The quest for the best soil for tomatoes usually starts with a focus on texture and drainage. Tomatoes, or Solanum lycopersicum, require a medium that allows for deep root penetration while maintaining moisture without saturation. In many urban landscapes, native soils are heavily compacted or contain high clay content, which can lead to stagnant water and root rot. To counteract this, we implement raised beds or integrated planters that utilize a custom-engineered soil mix. By elevating the planting area, we gain absolute control over the growing medium, ensuring it remains friable and oxygenated. This approach not only solves the drainage problem but also creates distinct vertical layers in the landscape, providing visual interest and defined walkways that improve the functionality of the outdoor living space.
Landscape Design Principles
In professional landscape architecture, we apply several key principles to ensure that agricultural zones enhance rather than detract from the property. Symmetry is a vital tool. By mirroring tomato trellis systems or using identical cedar raised beds, we create a sense of order and intentionality. These beds often serve as focal points in a kitchen garden, framed by permanent hardscaping such as bluestone pavers or decomposed granite. Visual balance is achieved by surrounding these highly productive zones with low-maintenance ornamental borders, which softens the utilitarian look of cages and stakes.
Elevation layers play a significant role in modern garden planning. We often design tiered systems where tomatoes occupy the upper levels to maximize sun exposure. This placement prevents taller vines from shadowing smaller herbs or floral accents. Irrigation planning must be subterranean or ground-level to maintain the aesthetic. Drip irrigation tubing should be tucked beneath a thick layer of organic mulch to keep the surface clean and reduce evaporation. By planning the layout with permanent walkways, we ensure that foot traffic never compacts the soil near the root zones, preserving the delicate pore space required for nutrient uptake.
Plant and Material Selection
| Plant Type | Sun Exposure | Soil Needs | Water Demand | Growth Speed | Maintenance Level |
| :— | :— | :— | :— | :— | :— |
| Indeterminate Tomato | Full Sun | Sandy Loam | High | Fast | High |
| Determinate Tomato | Full Sun | Compost-Rich Silt | Moderate | Medium | Moderate |
| Sweet Basil | Full Sun | Well-Drained Loam | Moderate | Fast | Low |
| French Marigold | Full Sun | Average Garden Soil | Low | Medium | Low |
| English Lavender | Full Sun | Gritty Alkaline Soil | Low | Slow | Moderate |
Implementation Strategy
The successful installation of a tomato-focused landscape begins with professional grading. Accurate leveling ensures that water moves away from the foundation of the home while settling evenly across the garden beds. Once the site is graded, we define the boundaries using steel edging or heavy-timber borders. This provides a crisp line between the lush garden soil and the surrounding lawn or gravel paths.
To create the best soil for tomatoes within these boundaries, we recommend a blend of 60 percent topsoil, 30 percent high-quality leaf compost, and 10 percent perlite or coarse sand. This mixture provides the structural stability of mineral soil with the aeration and water-holding capacity of organic matter. Before planting, we test the pH levels to ensure they sit between 6.0 and 6.8. If the soil is too acidic, we incorporate dolomitic lime; if it is too alkaline, we add elemental sulfur.
Planting should occur after the final frost, using a hand trowel to set the seedlings deep into the medium. We recommend burying the stem up to the first set of true leaves, as this encourages adventitious root growth. Once the plants are set, we apply a 3-inch layer of shredded cedar mulch or pine bark nuggets. This mulch serves three purposes: it suppresses weed growth, regulates soil temperature, and prevents soil-borne pathogens from splashing onto the foliage during rain events. Finally, we install heavy-duty powder-coated steel cages for support, ensuring they are anchored at least 12 inches into the ground to withstand late-summer wind storms.
Common Landscaping Failures
The most frequent error in home vegetable landscaping is poor drainage. Even the best soil for tomatoes will fail if it sits in a low spot where water collects. Without proper exit routes for excess moisture, the roots suffocate, leading to yellowing leaves and stunted growth. Another common failure is soil compaction caused by walking directly on the planting surface. We mitigate this by designing beds narrow enough to reach the center from the surrounding walkways, typically no wider than 4 feet.
Root overcrowding is another significant oversight. While it is tempting to plant many varieties close together for a lush look, tomatoes require significant air circulation to prevent fungal diseases like early blight. We recommend a minimum spacing of 24 inches to 36 inches between plants. Additionally, many gardeners neglect the importance of consistent irrigation. Fluctuating moisture levels cause the fruit to expand and contract rapidly, resulting in skin cracking and blossom end rot. A programmed irrigation controller paired with soil moisture sensors is the professional solution to this problem, ensuring a steady delivery of water to the root zone.
Seasonal Maintenance
Spring is the season for preparation and soil rejuvenation. Before the first plant goes into the ground, we work 2 inches of fresh worm castings or aged manure into the top layer of the beds. This replenishes the nitrogen and micronutrients depleted during the previous growing season. We also inspect the drip emitters to ensure no clogs have formed over the winter.
During the summer, the focus shifts to moisture management and structural support. As the vines grow, they must be tied to their supports using soft garden twine to avoid bruising the stems. Pruning the “suckers,” which are the small shoots that grow in the leaf axils, helps the plant direct its energy toward fruit production rather than excessive foliage. This also improves airflow throughout the canopy.
Autumn is the time for sanitation and soil protection. Once the harvest conclude, all plant debris should be removed to prevent pests and pathogens from over-wintering in the soil. We often suggest planting a cover crop such as winter rye or crimson clover. These “living mulches” protect the soil from erosion and add organic matter when tilled back into the earth the following spring.
Winter maintenance involves the care of hardscaping and tools. All irrigation valves must be drained and blown out with compressed air to prevent freezing damage. We use this dormant period to sharpen bypass pruners and oil the handles of shovels and spades. It is also the ideal time to review the garden’s performance and plan for crop rotation, ensuring that tomatoes are not planted in the exact same spot two years in succession.
Professional Landscaping FAQ
What is the ideal pH for tomato soil?
The optimal range is between 6.0 and 6.8. This slightly acidic environment ensures that essential nutrients like phosphorus and calcium remain chemically available to the plant roots, preventing common issues like stunted growth or blossom end rot.
How deep should my raised beds be for tomatoes?
For maximum yield, aim for a depth of at least 12 to 18 inches. While tomatoes can grow in shallower soil, deeper beds allow for more extensive root systems and better moisture retention during the heat of summer.
Can I reuse the same soil every year?
You can reuse soil if you amend it annually with fresh compost and practice crop rotation. Do not plant tomatoes in the same spot more than once every three years to prevent the buildup of soil-borne diseases and specific nutrient depletion.
Why is my soil drying out so fast?
This is often caused by a lack of organic matter or insufficient mulch depth. Incorporating more peat moss or compost improves water holding capacity, while a 3-inch layer of wood mulch prevents surface evaporation from sun and wind.
Is native soil or bagged potting mix better?
A blend is usually best for large-scale landscaping. Pure potting mix is often too light for tall, heavy tomato plants, while native soil can be too dense. Mixing native soil with organic amendments creates the most stable and nutritious environment.