
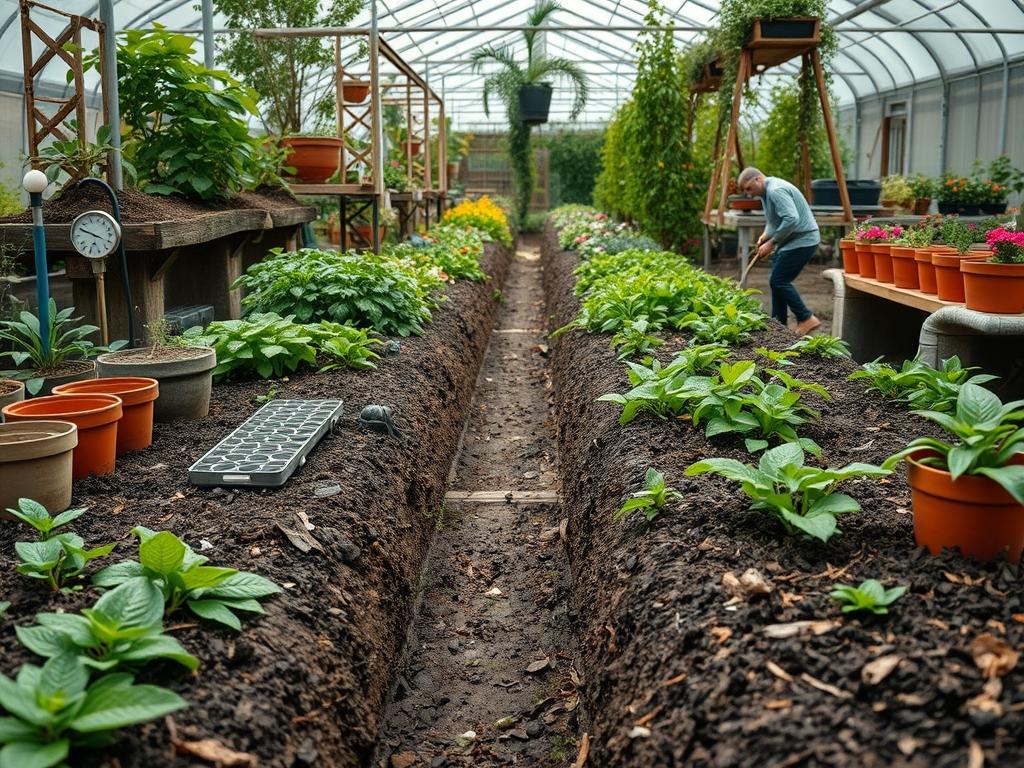
Maintaining a high performance landscape requires more than aesthetic considerations; it demands a deep understanding of soil vitality and subsurface infrastructure. For many homeowners, the visual appeal of a vegetable garden is often at odds with the functional necessity of composting. Traditional heaps or bins can disrupt the visual flow of a residential outdoor space, creating unsightly focal points that detract from the overall curb appeal. Trench composting basics provide a seamless solution, integrating nutrient management directly into the site plan. By utilizing the soil as a living filter, we can improve drainage, enhance moisture retention, and fortify the microbial environment without sacrificing the clean lines of a professionally designed garden. This method is particularly effective in urban and suburban environments where space is a premium and neighbors might be sensitive to the sights or scents of open decomposition.
The primary landscape challenge involves balancing crop rotation with soil replenishment. In a professional outdoor environment, every square foot must serve a purpose. Trench composting allows the architect to design “invisible” fertility zones. This technique involves burying organic waste directly in the vegetable rows, which eliminates the need for transporting finished compost from a distant bin to the planting site. From a functionality standpoint, this reduces labor and minimizes soil compaction by limiting foot traffic. Furthermore, this approach addresses the climate considerations of arid or windy regions. By burying the organic matter, we protect it from dehydration and wind erosion, ensuring that the valuable Nitrogen and Carbon remain exactly where the root systems of the next season’s crop can access them.
LANDSCAPE DESIGN PRINCIPLES
When integrating trench composting into a master landscape plan, symmetry and visual balance are paramount. A well structured vegetable garden should mirror the formality of the rest of the property. We often utilize a three year rotation system within the rows to maintain this balance. In year one, a trench is dug in the walkway area or between rows. In year two, that area becomes the planting zone, while a new trench is established nearby. This constant cycling ensures that the entire garden bed receives deep, subterranean fertilization over time. By planning these movements in advance, the landscape architect ensures that the garden never looks depleted or disorganized.
Elevation layers and focal points also play a significant role in this functional design. We often use Cedar wood raised beds or stone retaining walls to define the perimeter, which helps contain the composting activity and prevents the spread of unwanted seeds from kitchen scraps. Within these boundaries, irrigation planning must be precise. Because buried organic matter acts like a sponge, it creates a localized reservoir of moisture. We design irrigation layouts, typically using Drip emitters or Soaker hoses, to run parallel to these trenches. This synergy between the water delivery system and the buried organic material optimizes water use efficiency, a critical factor in sustainable landscaping.
Walkways should be clearly demarcated using high quality materials like Pea gravel, Decomposed granite, or Flagstone. These hardscaping elements provide the necessary structure to keep the garden navigable during the composting process. By maintaining a clean edge between the “working” trench and the “display” planting, the garden retains its professional polish. Visual balance is achieved by staggering the heights of the plants, with taller species like Pole beans on trellises providing a vertical backdrop to the lower, more compact vegetable rows.
PLANT AND MATERIAL SELECTION
Selecting the right plant species is essential for a successful trench composting system. Some plants are heavy feeders that thrive on the rich, decomposing matter, while others prefer more stable soil conditions.
| Plant Type | Sun Exposure | Soil Needs | Water Demand | Growth Speed | Maintenance Level |
| :— | :— | :— | :— | :— | :— |
| Tomato (Solanum lycopersicum) | Full Sun | High Organic Matter | High | Fast | Moderate |
| Zucchini (Cucurbita pepo) | Full Sun | Loose, Rich Loam | Moderate | Very Fast | Low |
| Kale (Brassica oleracea) | Full/Partial | Nitrogen Rich | Moderate | Moderate | Low |
| Sweet Pepper (Capsicum annuum) | Full Sun | Well Draining | Moderate | Moderate | Moderate |
| Bush Beans (Phaseolus vulgaris) | Full Sun | Average to Rich | Low | Fast | Low |
| Marigold (Tagetes) | Full Sun | Any | Low | Moderate | Low |
IMPLEMENTATION STRATEGY
The implementation of trench composting basics begins with a thorough site analysis and grading plan. To start, use a Spade or a D-handle shovel to excavate a trench across your designated vegetable row. The trench should be approximately 12 inches wide and 12 inches deep. This depth is vital; it ensures that the decaying material is deep enough to avoid attracting pests like rodents or raccoons, and it allows for a thick layer of soil on top to mask any odors.
Once the trench is excavated, fill the bottom 6 inches with a mixture of Kitchen scraps, Coffee grounds, and Green garden waste. Avoid adding meat, dairy, or oils, as these can disrupt the pH and attract unwanted scavengers. Over this “green” layer, add a thin layer of “brown” material such as Shredded cardboard or Dried leaves to balance the carbon to nitrogen ratio. Use a Garden rake to level the material before backfilling the remaining 6 inches with the original soil.
For a professional finish, apply a layer of Hardwood mulch or Straw over the top of the trench. This provides immediate curb appeal while the underground decomposition occurs. If the area is prone to heavy rains, ensure the site is graded with a slight 2 percent slope to prevent water from pooling in the freshly dug trench. Proper edging, using Metal bender board or Pressure treated timber, will keep the soil in place and maintain the crisp lines of the garden layout. If you are integrating this into a larger backyard plan, consider the drainage path; the trench should never be placed in a low spot where it could become waterlogged and anaerobic.
COMMON LANDSCAPING FAILURES
One of the most frequent mistakes in trench composting is poor drainage management. If a trench is dug in heavy Clay soil without proper amendment, it can act like a bathtub, holding water and causing the organic matter to rot anaerobically. This produces a foul smell and can harm the roots of nearby plants. To avoid this, we recommend testing the pervasion rate of the soil before digging. If drainage is slow, consider adding Perlite or Coarse sand to the backfill soil to increase porosity.
Another common failure is root overcrowding and improper spacing. Homeowners often plant directly over a fresh trench too soon. While the organic matter is actively decomposing, the high microbial activity can temporarily tie up nitrogen or produce heat that stresses young seedlings. It is best to wait at least 4 to 6 weeks before planting directly on top of a trench, or simply plant in the adjacent row while the trench matures. Furthermore, soil compaction is a major deterrent to success. If people walk directly over the buried trenches, the oxygen levels in the soil drop, slowing down the decomposition process significantly. We solve this by implementing permanent Garden pathways that clearly define where foot traffic is permitted.
Finally, irrigation inefficiencies can ruin the balance. If the irrigation frequency is too high, the trench stays saturated; if it is too low, the decomposition stops. Using a Soil moisture meter can help fine tune the delivery to ensure the buried material stays as damp as a wrung out sponge.
SEASONAL MAINTENANCE
In the spring, focus on site preparation and the excavation of new trenches. This is the time to assess the soil structure from the previous year’s trenches. Use a Garden fork to lightly aerate the area, noting the presence of Earthworms, which are a primary indicator of a healthy, functioning ecosystem. As you transition into summer, maintenance shifts toward moisture management. The high heat can dry out the upper layers of soil, so maintaining a 3 inch layer of mulch is essential to protect the underground composting process.
Autumn is the most productive season for trench composting. As the garden is cleared of finishes crops, utilize the Dried stalks and Fallen leaves as the primary carbon source for new trenches. This is also the time to “put the garden to bed” by digging deep trenches that will process throughout the winter. In winter, activity slows down significantly in colder climates. However, the soil acts as an insulator. By covering your trenches with Landscape fabric or a thick layer of Evergreen boughs, you can keep the underground microbial community active longer into the season.
PROFESSIONAL LANDSCAPING FAQ
Can I trench compost year round?
In mild climates, yes. In freezing regions, dig your trenches in late autumn before the ground freezes. Continue adding scraps to the pre-dug trench and cover with a heavy Burlap sack or heavy mulch to retain internal ground heat.
What tools are essential for this method?
A high quality Square-point shovel for clean vertical cuts and a Garden fork for aerating the soil are the primary requirements. A Compost thermometer is also helpful for monitoring the internal temperature of the buried organic matter.
How deep should the trench be for safety?
A minimum depth of 12 inches is recommended. Placing at least 6 inches of clean soil over the organic waste effectively blocks scents that attract pests and ensures the material stays within the most biologically active root zone.
Does trench composting attract rodents?
When performed correctly at a depth of 12 inches, it rarely attracts pests. Avoid adding meat, dairy, or bread products. Ensuring the top soil layer is firmly packed and covered with mulch provides an extra deterrent against scavengers.
How long does it take to decompose?
In warm, moist conditions, most organic matter will break down in 4 to 6 months. In colder or drier climates, it may take a full year. Standard landscape practice is to rotate trenches annually to allow for complete decomposition.