
Preparing a new landscape often begins with the raw, untamed reality of construction-compacted soil. For homeowners seeking to elevate curb appeal and outdoor functionality, the foundation lies beneath the surface. Garden tilling techniques serve as the essential bridge between a sterile lot and a thriving ecosystem. Climate plays a significant role in this transition, as heavy clay or sandy arid soils dictate the intensity and timing of mechanical intervention. A well-executed tilling strategy ensures that moisture reaches the root zones while preventing the stagnant pools that often plague poorly planned drainage systems. By addressing the subterranean structure before a single seedling is planted, we create a sustainable environment that supports aesthetic goals and practical living spaces.
The transformation of a new plot requires more than a simple surface-level clearing. In many new developments, the topsoil has been stripped away, leaving behind a hard pan of subsoil that is nearly impenetrable to air and water. This compaction is the primary enemy of the landscape architect. Effective garden tilling techniques involve breaking this hard layer to a depth of at least 8 to 12 inches, allowing for the reintroduction of organic life. This process is not merely about making the ground soft for planting; it is about restoring the vertical movement of water and nutrients. When the soil is properly prepared, the entire landscape functions as a giant sponge, managing stormwater runoff and reducing the need for intensive chemical interventions later in the life of the garden.
Landscape Design Principles
Landscape design relies on the intentional manipulation of space to create harmony between the built environment and the natural world. Symmetry provides a sense of order, especially in formal entryways where mirrored plantings guide the visitor toward the front door. However, achieving this symmetry requires uniform soil conditions. If one side of a walkway is compacted while the other is loose, the growth rates of your Boxwood or Privet hedges will vary, destroying the visual balance.
Focal points like specimen trees or sculptural hardscaping require deep soil preparation to ensure long-term stability and health. Elevation layers are another critical consideration. Tilling allows for the integration of organic matter to raise bed heights, creating a natural verticality that adds depth to the horizontal plane of the yard. This mounding, or berming, must be planned alongside irrigation. If the subsoil is too dense, even the most expensive drip systems will fail due to surface runoff.
Walkways and visual balance are also anchored by the soil stability. A loose, well-aerated base allows for better settling under pavers while ensuring that adjacent garden beds remain permeable. When designing a new plot, we must consider how the flow of water will move across the tilled surface. Grading the tilled area to a 1 or 2 percent slope away from the home foundation is a non-negotiable principle of professional landscaping. This ensures that the newly friable soil does not become a muddy basin that threatens the structural integrity of the residence.
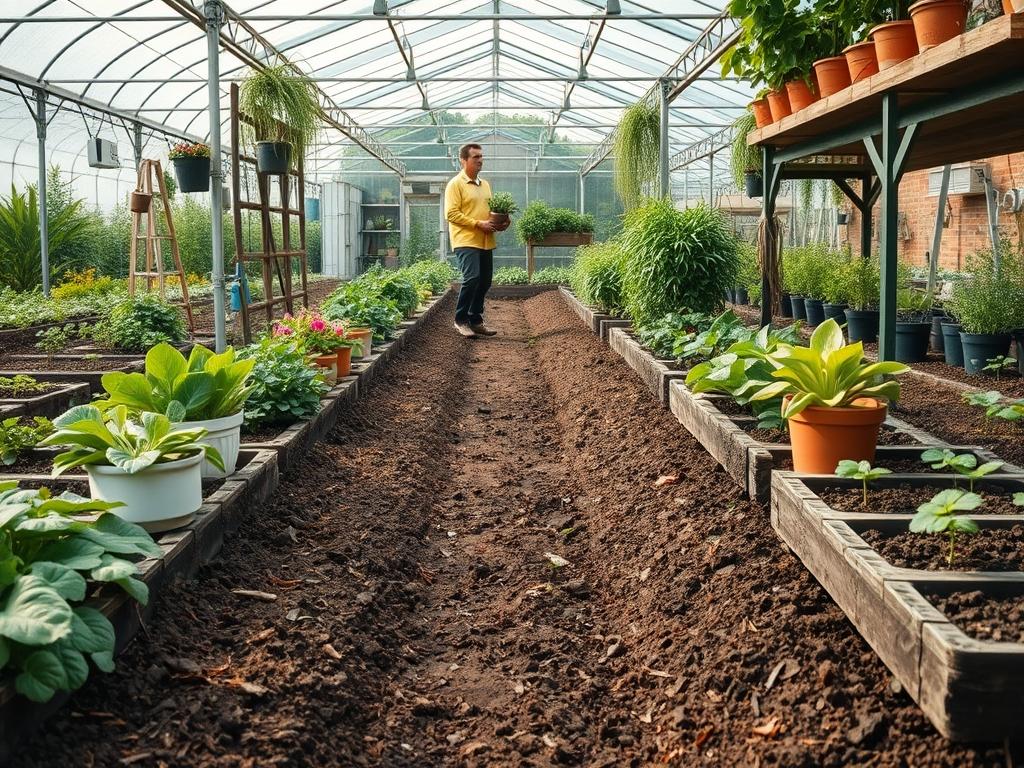
Plant and Material Selection
Selecting the right biological components for a newly tilled plot depends heavily on the adjusted soil texture and the local microclimate. The following table outlines standard selections for a diverse residential landscape.
| Plant Type | Sun Exposure | Soil Needs | Water Demand | Growth Speed | Maintenance Level |
| :— | :— | :— | :— | :— | :— |
| Boxwood | Full to Partial | Well-drained | Moderate | Slow | Low |
| Lavender | Full Sun | Sandy and Gravelly | Low | Moderate | Medium |
| Hostas | Full Shade | Rich and Moist | High | Fast | Low |
| Coneflower | Full Sun | Loamy | Low | Fast | Low |
| Japanese Maple | Partial Shade | Acidic and Loamy | Moderate | Slow | Medium |
| Switchgrass | Full Sun | Any (Adaptable) | Low | Fast | Very Low |
| Hydrangea | Partial Shade | Moist and Rich | High | Fast | Medium |
When selecting materials for the tilling process itself, the professional architect looks toward soil amendments. Sphagnum peat moss is excellent for moisture retention in sandy soils, while leaf mold or aged mushroom compost provides the necessary microbial boost for tired, construction-damaged earth. For hardscaping elements like retaining walls, the preparation of the soil behind the wall is as important as the stones themselves. Tilling in a layer of angular gravel or coarse sand can improve drainage behind these structures.
Implementation Strategy
The successful implementation of garden tilling techniques follows a rigid sequence to ensure the best possible results. First, the site must be cleared of all debris, including large rocks, construction leftover materials, and aggressive perennial weeds. If the plot is covered in existing turf, use a manual sod cutter or an herbicide to clear the area. Tilling live weeds into the soil often results in a massive explosion of unwanted growth as the machine chops roots into hundreds of individual segments, each capable of spawning a new plant.
Once the surface is clear, the primary tilling begins. For large residential plots, a rear-tine tiller is the preferred tool. Unlike front-tine models, which can be difficult to control, rear-tine tillers have the weight and power to penetrate hard clay. Begin by tilling in one direction, then repeat the process perpendicular to your first passes. This “cross-hatching” method ensures that no patches of compacted soil remain. For smaller, delicate areas near existing root systems of large trees, a broadfork or U-bar is a better choice. These manual tools allow you to aerate the soil without severing the critical feeder roots of established vegetation.
After the initial break-up of the soil, it is time to add amendments. Apply a 3-inch layer of organic compost across the entire surface. If the soil pH is out of balance, this is the time to add pelletized lime to raise pH or elemental sulfur to lower it. Tilling these materials into the top 6 inches of the soil integrates them exactly where the new plant roots will reside. Following the final pass of the tiller, use a heavy-duty garden rake to level the surface. Grading is the final step before planting or mulching. The soil should be smooth, with no low spots where water might collect. Finally, install your edging materials, such as steel or recycled plastic strips, to define the crisp lines between the garden beds and the lawn areas.
Common Landscaping Failures
The most frequent mistake in garden tilling is working the soil while it is too wet. Tilling saturated earth destroys the soil structure, squeezing out the air pockets and creating hard, brick-like clods when the sun dries the ground. This creates a condition often called “puddling” which can take years of natural freeze-thaw cycles to correct. To test this, squeeze a handful of soil into a ball. If it crumbles when poked, it is ready. If it holds its shape like modeling clay, wait for it to dry out.
Another failure is over-tilling. While it is tempting to turn the soil into a fine, flour-like powder, this is actually detrimental. Soil needs a certain amount of “tilth,” or small crumbly aggregates, to maintain its health. Over-tilled soil easily crusts over after the first rain, preventing water from infiltrating and seeds from emerging.
Root overcrowding and improper spacing also lead to landscape failure. Homeowners often plant for the size of the nursery pot rather than the mature size of the plant. If the tilled area is only a small pocket in the middle of a compacted lawn, the roots will eventually hit the “pot-bound” walls of the harder soil and begin to circle, leading to the eventual decline of the tree or shrub. Ensure the tilled bed is significantly larger than the initial root ball to encourage outward growth.
Seasonal Maintenance
Landscape management is a year-round commitment that evolves with the seasons. In the spring, the focus is on assessing the winter’s impact. Check for soil heaving or areas where the tilled earth has settled deeper than expected. This is the ideal time to add a light layer of finished compost and refresh the mulch depth to a consistent 3 inches. Mulch is critical for protecting the finely tilled soil structure from the pounding of heavy spring rains.
Summer maintenance involves managing the moisture levels within the tilled beds. Because tilled soil is more porous, it can dry out faster than compacted ground during heatwaves. Deep, infrequent watering is superior to shallow daily misting. This encourages the roots to grow downward into the cooler, deeper layers of the soil you prepared during the implementation phase.
Autumn is the season for soil replenishment. As plants begin to go dormant, they leave behind organic matter. Do not strip the beds of all fallen leaves; instead, shred them and leave them to decompose. This mimics the natural forest floor and continues the work of the tiller by adding nutrients back into the earth. Winter is a time for rest, but it is also the time to minimize foot traffic. Treading on tilled beds when the ground is partially frozen or muddy will quickly re-compact the soil, undoing the hard work of the previous season.
Professional Landscaping FAQ
How deep should I till for a new flower bed?
For most residential plants, a depth of 8 to 12 inches is sufficient. This allows for deep root penetration and provides enough room to mix in several inches of organic compost or other necessary soil amendments.
Can I till my garden every single year?
Annual tilling is often unnecessary and can damage the soil structure or the beneficial fungal networks. Once a plot is established, focus on “no-till” methods. Simply add organic matter to the surface and let the worms do the work.
What is the best tool for tilling a small backyard?
A front-tine tiller or a cultivator is usually enough for loosened soil. However, if the ground is very hard or has never been worked, renting a rear-tine power tiller will save significant time and physical strain.
What should I do if my soil is heavy clay?
Avoid adding sand, as this can create a concrete-like consistency. Instead, till in large amounts of organic matter like compost or gypsum. These materials help break the ionic bonds of clay particles, improving drainage and aeration over time.
How do I prevent weeds from returning after tilling?
Tilling brings buried weed seeds to the surface where they can germinate. To prevent this, cover the freshly tilled area with a 3-inch layer of wood mulch or straw immediately after planting to block the light.