
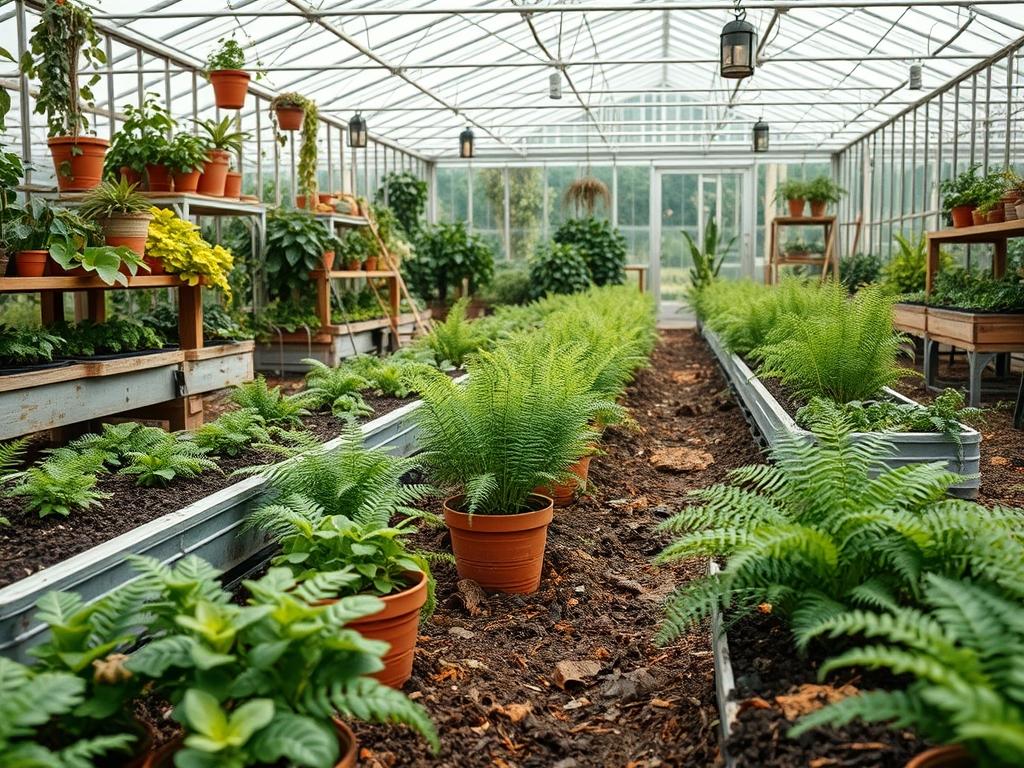
Successful landscape architecture relies on the delicate balance between structural integrity and biological vitality. When designing outdoor environments that feature lush, prehistoric aesthetics, ferns often serve as the primary foundational element. However, the most significant challenge in maintaining these species within a residential or commercial landscape is the management of the rhizosphere. Ferns require a specific hydraulic environment that prevents desiccation while avoiding the anaerobic conditions associated with stagnant water. Achieving this balance depends entirely on the substrate. Selecting or blending the correct Fern Potting Mix Recipes is not merely a gardening task; it is a critical engineering step in ensuring the long term viability of your softscaping. A well designed mix enhances curb appeal by maintaining vibrant, green fronds throughout the growing season, even during periods of fluctuating humidity.
Climate considerations play a pivotal role in how we approach soil composition. In arid regions, the priority shifts toward maximum moisture retention through the use of organic colloids. In temperate or humid coastal areas, the focus moves toward aeration to prevent fungal pathogens. From a functional perspective, ferns provide excellent ground cover and textural contrast against hardscape elements like Pavers or Natural Stone Walls. By utilizing high quality potting mixes, we can ensure these plants thrive in “micro-habitats” such as shaded entryways, north facing retaining walls, or humid courtyard pockets, turning otherwise difficult areas into lush focal points.
Landscape Design Principles
In professional landscape architecture, we view ferns as the “fine texture” of the garden. Their intricate frond patterns provide a soft visual counterpoint to the heavy, solid lines of Concrete Walkways or Architectural Edging. Symmetry is rarely the goal with ferns; instead, we aim for a naturalistic, asymmetrical balance. By grouping ferns in odd numbered clusters, we mimic the randomness of a forest floor, which creates a more immersive and calming outdoor environment.
Focal points are established by using larger species, such as the Australian Tree Fern, positioned at the junction of paths or near water features. These “anchors” provide height and drama, drawing the eye upward. To support these vertical elements, elevation layers must be considered. We often design tiered planter boxes or berms that allow ferns to be experienced at eye level. This layering also aids in drainage planning. By elevating the planting bed, we use gravity to assist in water movement, making the internal structure of the Fern Potting Mix even more vital for holding onto necessary hydration while the excess drains away.
Integrating irrigation into these designed spaces requires precision. We frequently specify Drip Irrigation Lines buried 2 inches beneath the Mulch layer. This delivery system works in tandem with the potting mix to maintain a constant “field capacity” of moisture. Walkways should be planned to allow for maintenance access without compacting the specialized soil. Compaction is the enemy of fern health, as it crushes the air pockets required for root respiration. Therefore, the visual balance of the garden must be matched by a subterranean balance of air and water.
Plant and Material Selection
| Plant Type | Sun Exposure | Soil Needs | Water Demand | Growth Speed | Maintenance Level |
| :— | :— | :— | :— | :— | :— |
| Ostrich Fern | Full Shade to Part Shade | Rich, Loamy, Moist | High | Fast | Moderate |
| Maidenhair Fern | Dappled Shade | High Organic Matter | Consistent Moisture | Moderate | High |
| Japanese Painted Fern | Full Shade | Well Draining | Moderate | Slow | Low |
| Sword Fern | Part Shade to Shade | Humus Rich | Moderate | Fast | Low |
| Autumn Fern | Part Shade | Acidic to Neutral | Moderate | Moderate | Low |
| Tree Fern | Part Shade | High Drainage/High Humidity | Very High | Slow | Moderate |
For these species to thrive, the material selection for the substrate must be intentional. A standard “all purpose” potting soil is rarely sufficient. Instead, we recommend three primary Fern Potting Mix Recipes tailored to specific environmental needs.
1. The Standard Woodland Blend: This mix utilizes 2 parts Peat Moss, 1 part Perlite, and 1 part fine Pine Bark. The Peat Moss provides the acidity and moisture retention ferns crave, while the Perlite ensures that the roots have access to oxygen.
2. The High-Performance Moisture Mix: For areas with higher wind exposure or lower humidity, we use 2 parts Coconut Coir, 1 part Vermiculite, and 1 part Leaf Mold. Coconut Coir is a more sustainable alternative to peat and has excellent re-wetting capabilities. Vermiculite acts like a sponge, holding water molecules within its layers.
3. The Epiphytic or Drainage Blend: For species that grow in rocky crevices or on trees, such as the Staghorn Fern, a mix of 1 part Orchid Bark, 1 part Horticultural Charcoal, and 1 part Sphagnum Moss is ideal. The Horticultural Charcoal filters impurities and keeps the mix “sweet” by preventing the buildup of salts and odors.
Implementation Strategy
Implementing a professional fern garden begins with site grading. You must ensure that the subsoil slopes away from structural foundations at a minimum 2 percent grade. Once the grade is established, we lay out the garden beds using Steel Edging or Timber Borders to define the space and prevent the specialized potting mix from washing away or mixing with the native soil.
The first step in planning the layout is identifying the “low spots” where water naturally collects. These areas are reserved for the most moisture loving species like the Cinnamon Fern. For the general planting area, we excavate to a depth of 12 inches. We do not simply fill the hole with the new mix; we “bridge” the transition by mixing 3 inches of the specialized Fern Potting Mix with the native topsoil at the bottom of the trench. This prevents the “bathtub effect” where water sits at the interface of two different soil textures.
Next, place the plants according to your design plan, ensuring that the crown of the fern is slightly above the soil surface. Buried crowns lead to rot. Once positioned, backfill with your chosen Fern Potting Mix Recipe, firming it gently with your hands to remove large voids without compressing the delicate structure. After planting, apply a 2 inch layer of Arborist Chips or Fine Shredded Hardwood Mulch. This mulch layer is functional as well as aesthetic; it regulates soil temperature and reduces the evaporation rate of the moisture held within the mix. Finally, install your Hardscaping elements, such as Stepping Stones, ensuring they are set firmly so they do not shift and disturb the root zones.
Common Landscaping Failures
One of the most frequent failures in fern landscaping is poor drainage. While ferns love water, they are not aquatic plants. If the soil remains saturated without oxygen, the roots will succumb to Pythium or other root rot pathogens. This often happens when designers use heavy clay soils or fail to include enough Perlite or Pumice in their recipes.
Root overcrowding is another common issue. Many ferns are rhizomatous, meaning they spread via underground stems. If they are planted too closely to Retaining Walls or paved edges, the roots can become stunted, leading to diminished frond size. Proper spacing, usually 18 to 24 inches apart for medium sized species, is essential for long term health.
Soil compaction often occurs during the construction phase. If heavy machinery or even heavy foot traffic crosses the planting beds after the mix has been installed, the structural integrity of the Peat Moss and Perlite is destroyed. This limits the “pore space” available for water and air. Lastly, irrigation inefficiencies, such as overhead spraying during the heat of the day, can lead to frond scorch. A professional design always favors low volume, targeted irrigation at the soil level.
Seasonal Maintenance
Spring is the season for renewal and intervention. As the “fiddleheads” emerge, it is the ideal time to apply a slow release, low concentration fertilizer. We recommend a balanced 10-10-10 Organic Fertilizer at half strength. This is also the time to refresh the Mulch layers and check the Irrigation Emitters for clogs.
In the summer, the focus shifts to hydration management. During heatwaves, even the best Fern Potting Mix Recipes may need supplemental watering. Monitor the moisture level by inserting a finger 2 inches into the soil. If it feels dry, an extra deep soaking is required. Avoid pruning green fronds during this time, as they are providing energy to the plant.
Autumn involves cleaning and protection. As some ferns begin to go dormant, you can trim back browned fronds to maintain a tidy appearance. This is also the time to ensure that fallen leaves from overhead trees do not smother the crowns of smaller ferns. A light layer of leaves is beneficial as natural mulch, but a thick, wet mat can induce rot.
Winter maintenance is minimal but vital in colder climates. For non evergreen species, the dead fronds can be left in place to provide a natural “blanket” for the crown, protecting it from the freeze thaw cycle. In regions with heavy snow, ensure that snow removal does not involve piling salty slush onto the fern beds, as the salt will ruin the delicate chemical balance of your specialized soil.
Professional Landscaping FAQ
What is the best way to prevent soil compaction in fern beds?
Install permanent Flagstone Pathing or Stepping Stones to designate walking areas. This directs foot traffic away from the delicate root zones and keeps the Fern Potting Mix light and airy for maximum root respiration and drainage.
Can I use regular garden soil for potted ferns?
Standard garden soil is too heavy and lacks the necessary porosity. It often contains weed seeds and pathogens. Professional results require a sterile, soilless medium like a blend of Peat, Perlite, and Pine Bark to ensure healthy growth.
How deep should the mulch layer be around ferns?
Maintain a consistent 2 inch layer of organic mulch. This depth is sufficient to retain moisture and suppress weeds without burying the fern crowns, which can lead to rot and plant death if air circulation is blocked.
Why are my fern fronds turning yellow despite regular watering?
Yellowing often indicates either a nutrient deficiency or poor drainage leading to root stress. Check the soil moisture levels. If the mix is soggy, increase the amount of Perlite or Horticultural Charcoal to improve the aeration of the substrate.
When is the best time to repot or divide ferns?
Early spring, just as new growth begins to appear, is the optimal time. This allows the root system to establish itself in the new Fern Potting Mix during the mild weather of spring before the heat of summer arrives.