
Achieving a lush, evergreen sanctuary requires more than just digging a hole and placing a shrub. In the world of professional landscape architecture, the health of your laurel hedge—whether it is a towering Cherry Laurel or a refined Portuguese Laurel—is entirely dependent on the structural integrity and nutrient density of the earth beneath it. Choosing the best soil for laurel is the most critical decision a property owner can make during the installation phase. These plants often serve as the backbone of a landscape, providing privacy screening, noise reduction, and a consistent green backdrop that enhances curb appeal year round. Without the correct soil environment, even the most expensive specimens will succumb to chlorosis, root rot, or stunted growth, failing to provide the outdoor functionality for which they were intended.
Success begins with understanding that laurels are hungry, thirsty, yet drainage dependent organisms. In varied climates, the soil must be engineered to balance moisture retention with rapid drainage. If the ground is too heavy with clay, the roots will suffocate in standing water during the rainy season. Conversely, if the soil is too sandy, the plant will dehydrate before it can establish a deep root system. A professional grade installation prioritizes a soil profile that mimics the fertile, slightly acidic conditions of a woodland floor. This ensures the leaves remain a deep, waxy green and the plant maintains the vigor necessary to withstand local environmental stressors like wind or heat.
Landscape Design Principles
When integrating laurel into a master plan, we look at the site through the lens of architectural geometry and structural layers. Symmetry is often a primary goal. A perfectly manicured Cherry Laurel hedge can act as a living wall, creating “outdoor rooms” that define functional spaces such as dining areas or quiet meditation zones. These hedges provide a clean, horizontal line that balances the verticality of a home, grounding the structure within the natural environment. To achieve this, the planting trench must be uniform in depth and soil quality to ensure every plant in the line grows at the same rate, preventing unsightly gaps or uneven heights.
Elevation layers are equally important for visual interest. We rarely plant laurel in isolation. Instead, we use it as a high-density backdrop for lower layers of perennial flowers or decorative grasses. By creating tiers, we move the eye upward from the ground plane to the mid-layer, eventually reaching the tree canopy. This requires careful irrigation planning. Laurel hedges have different water demands than the delicate flowers planted at their feet. We often utilize Drip Irrigation systems with independent zones to ensure the laurel receives deep, infrequent watering that encourages deep rooting, while the foreground plants get more frequent, shallow cycles.
Walkways and hardscaping must be factored into the initial design to prevent future root interference. While laurel roots are generally not as aggressive as those of oak or maple, they still require space to breathe. Placing a stone path too close to a new hedge can lead to soil compaction, which limits oxygen availability. We recommend a minimum three-foot offset between the center of the laurel trunk and any permanent hardscape feature. This space allows for a generous application of Organic Mulch, which protects the root zone and slowly enriches the soil over time.
Plant and Material Selection
| Plant Type | Sun Exposure | Soil Needs | Water Demand | Growth Speed | Maintenance Level |
| :— | :— | :— | :— | :— | :— |
| Cherry Laurel | Full Sun to Shade | Deep, Well-draining Loam | Moderate | Fast | Medium |
| Portuguese Laurel | Full Sun to Part Shade | Chalky or Acidic Soil | Moderate | Medium | Low |
| Mountain Laurel | Part Shade | Highly Acidic, Cool Soil | High | Slow | High |
| Schip Laurel | Full Sun to Shade | Nutrient-rich, Moist | Moderate | Fast | Medium |
| Bay Laurel | Full Sun | Sandy, Sharp Drainage | Low | Slow | Medium |
Implementation Strategy
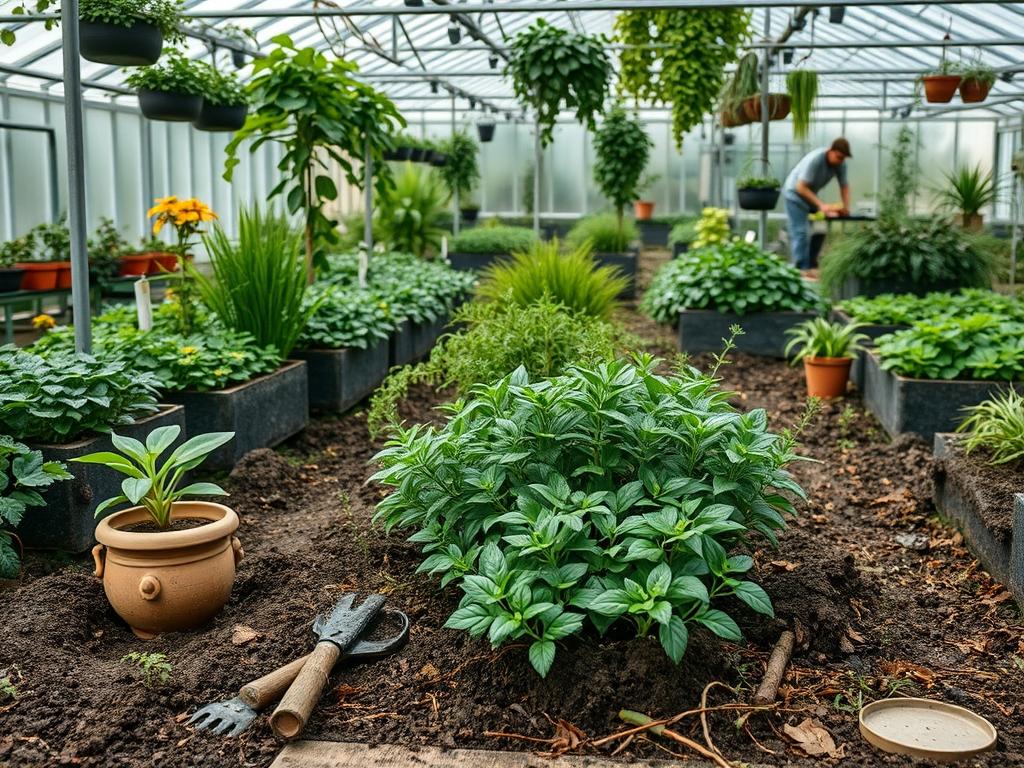
The process of installing a laurel hedge begins with site grading. Proper grading ensures that water flows away from the root balls and toward designated drainage areas or dry wells. Once the grade is established, we excavate a trench that is at least twice as wide as the root balls. This is the moment to optimize the soil. The best soil for laurel is typically a mix of 60% native soil, 20% Aged Compost, and 20% Fine Bark or Perlite to assist with aeration. If the native soil is heavy clay, we increase the organic matter and add Gypsum to help break down the tight mineral bonds.
After the soil is prepared, we focus on the edging. A clean, spade-cut edge or a durable metal border prevents turf grass from creeping into the laurel bed, reducing competition for nutrients. Each plant should be set so the top of the root ball is slightly above the surrounding soil level, never deeper. Deep planting is a common mistake that leads to stem rot. Once the plants are in place, we apply a three-inch layer of Arborist Chips or Pine Bark Mulch. This mulch layer serves multiple purposes: it regulates soil temperature, suppresses weeds, and as it decomposes, it feeds the microbial life that keeps the soil fertile.
Hardscaping elements, such as Retaining Walls or stone pillars, should be installed before the plants are in the ground. This prevents heavy machinery from compacting the newly prepared soil beds. If a retaining wall is being used to level a sloped area for a hedge, ensure that Perforated Drain Pipe is installed behind the wall. This prevents hydrostatic pressure and soggy soil pockets that would otherwise drown the laurel’s root system.
Common Landscaping Failures
The most frequent failure we encounter in the field is poor drainage management. Many homeowners assume that because a plant likes water, it can sit in a puddle. Laurel roots require a delicate balance of water and oxygen; in saturated soil, the oxygen is displaced, and the roots literally drown, leading to Phytophthora or other fungal diseases. Another common error is soil compaction. During construction, heavy equipment often traverses the planting area, crushing the soil structure. Without proper remediation, such as deep tilling or the addition of Expanded Shale, the laurel will struggle to penetrate the hardened earth.
Improper spacing is another pitfall. In an effort to get an “instant” screen, many people plant laurels too close together. This creates an environment of high humidity and poor air circulation, which are the primary drivers of Powdery Mildew and Shot Hole Fungus. Overcrowding also leads to nutrient competition, where the plants effectively starve each other out. Finally, irrigation inefficiencies, such as using overhead sprinklers that wet the foliage daily, can lead to leaf burn and fungal outbreaks. Deep, root-focused watering is always the superior method.
Seasonal Maintenance
Spring is the season for growth and renewal. This is the optimal time to apply a Slow-release Nitrogen Fertilizer and to check the soil pH. If the soil has become too alkaline, a light application of Elemental Sulfur can help keep it in the preferred range for laurel health. Pruning should be done after the first flush of new growth to shape the hedge and encourage density.
Summer maintenance is primarily about water management. During periods of extreme heat, even established laurels may need supplemental irrigation. Monitor the soil moisture by inserting a probe or a finger several inches deep; the soil should feel moist but not muddy. Avoid heavy pruning in the peak of summer, as this can stress the plant and expose the interior leaves to sunburn.
Autumn is the best time for “soil banking.” Adding a fresh layer of Compost or Leaf Mold to the surface of the soil allows nutrients to leach down during the winter rains. This is also the window for planting new laurels, as the cooler temperatures and increased rainfall help the plants establish roots before the ground freezes.
Winter is the dormant phase. In colder climates, protecting the foliage from “winter burn” is essential. This is caused by cold winds evaporating moisture from the leaves while the roots are frozen and unable to replenish it. Applying an Anti-desiccant Spray can provide a protective coating. It is also the time to inspect the structure of the hedge and remove any branches damaged by snow load using sharp, sterilized Pruning Shears.
Professional Landscaping FAQ
What is the best soil for laurel growth?
A well-draining, nutrient-dense Sandy Loam is ideal. Laurels prefer a soil pH between 5.5 and 7.0. Incorporating Organic Compost into the native soil ensures the correct balance of aeration and moisture retention for long-term leaf health.
How often should I water a newly planted laurel hedge?
New laurels require deep watering two to three times per week during their first growing season. Once established, they are relatively drought-tolerant, but they still benefit from a deep soaking every week during the hottest months of summer.
Why are the leaves on my laurel turning yellow?
Yellow leaves, or chlorosis, often indicate a nutrient deficiency or poor drainage. Check the soil moisture first. If the soil is not overly wet, the plant likely needs an application of Chelated Iron or an acidic fertilizer.
Can I grow laurel in heavy clay soil?
Yes, but you must amend the soil significantly. Mix the native clay with Coarse Sand and Organic Matter. Planting the laurel in a slightly raised mound can also help excess water drain away from the sensitive root crown.
When is the best time to prune my laurel for density?
The best time to prune for density is late spring or early summer, just after the first major growth spurt. Use Bypass Pruners to cut individual stems, which avoids the leaf-shredding damage caused by electric hedge trimmers.