
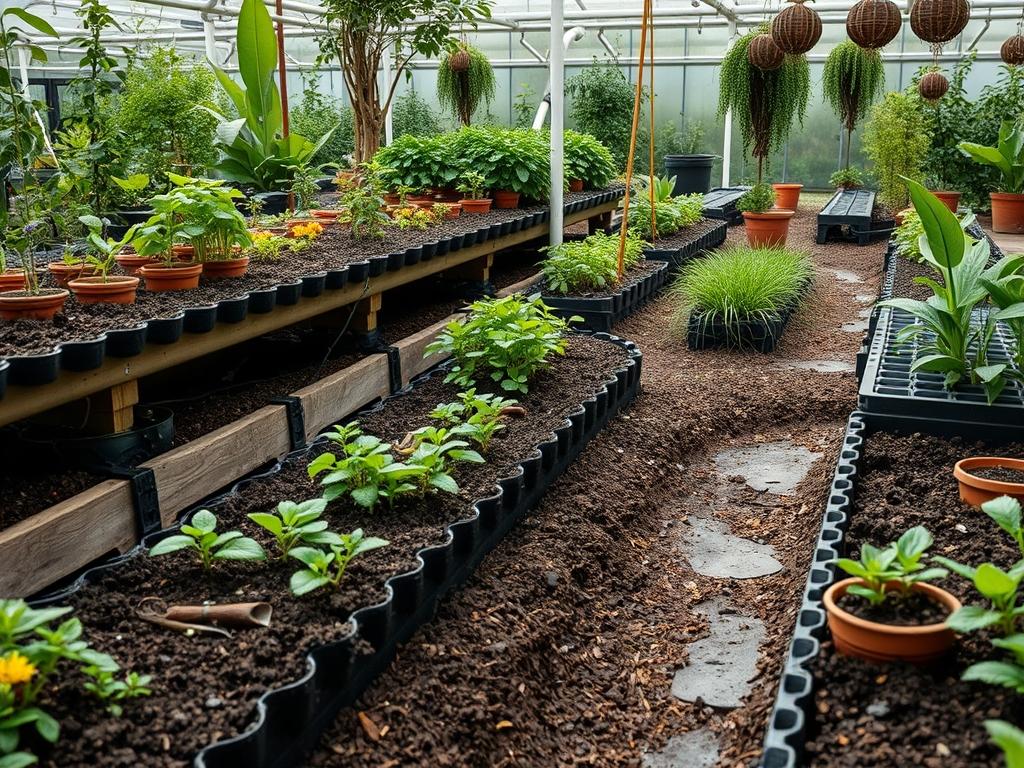
The realization that your soil contains legacy contaminants like heavy metals, petroleum hydrocarbons, or pesticides can be a significant roadblock for any ambitious landscaping project. Whether you are dealing with a former industrial site or a suburban lot with lead paint residue, soil health is the non negotiable foundation of outdoor functionality. Restoring this foundation requires more than just aesthetic improvements. It demands a scientific approach known as bio-remediation. By understanding Bio-remediation Basics, a landscape architect can transform a toxic patch of earth into a thriving, safe environment that enhances curb appeal and supports local ecology. The process involves using living organisms, primarily plants and soil microbes, to degrade or sequester pollutants. This strategy is often more cost effective and less invasive than traditional dig and dump methods, which involve hauling tons of soil to a landfill.
Effective landscape design in the face of contamination must balance environmental safety with visual harmony. In many urban environments, the goal is to create a space that feels intentional rather than clinical. When planning a remediation landscape, climate considerations play a pivotal role. The speed of microbial activity and plant growth is tied to temperature and moisture levels. A site in the Pacific Northwest will require different microbial stimulants than a site in the arid Southwest. Beyond chemistry, the outdoor functionality must remain high. This means designing zones where children and pets are safe from direct soil contact while the remediation process occurs in the background.
Landscape Design Principles
Integrating Bio-remediation Basics into a formal landscape requires a masterful use of symmetry and focal points to guide the eye away from the technical aspects of the work. Symmetry is often achieved through the use of raised containment beds or structured planting rows that mirror each other across a central axis. These beds serve a dual purpose. They organize the remediation plants while preventing the migration of contaminated runoff during heavy rain. Focal points, such as a large Poplar Tree or a sculptural piece of hardscaping, provide a sense of permanence and intentionality. These elements anchor the design, making the remediation efforts appear as a conscious aesthetic choice rather than a reactionary measure.
Elevation layers are critical when managing tainted sites. By using Retaining Walls and terracing, a designer can control the flow of water and ensure that contaminants do not pool in low lying areas. This is particularly important for managing site drainage. Grading the land to a 2 percent slope away from residential structures prevents water from leaching heavy metals into foundations or basements. Walkways should be constructed using non porous materials or elevated decking to minimize foot traffic on sensitive remediation zones. This maintains a visual balance between the wilder, hyperaccumulating plant zones and the clean, usable hardscaped areas. Furthermore, irrigation planning must be precise. Over watering can lead to nutrient leaching or the deep migration of toxins into the groundwater table, while under watering will cause the remedial plants to fail.
Plant and Material Selection
The following table outlines key species and materials used in modern bio-remediation landscaping. These plants are selected for their ability to either extract toxins (phytoextraction) or stabilize them within the root zone (phytostabilization).
| Plant Type | Sun Exposure | Soil Needs | Water Demand | Growth Speed | Maintenance Level |
| :— | :— | :— | :— | :— | :— |
| Indian Mustard | Full Sun | Well Drained | Moderate | Fast | High |
| Sunflowers | Full Sun | Loamy/Neutral | High | Rapid | Moderate |
| Willow Trees | Full/Partial | Moist/Heavy | Very High | Fast | Moderate |
| Alfalfa | Full Sun | Deep/Porous | Moderate | Medium | Low |
| Poplar Trees | Full Sun | Adaptable | High | Rapid | Low |
| Vetiver Grass | Full Sun | Sandy/Loam | Low | Fast | Low |
Implementation Strategy
The successful implementation of a bio-remediation plan begins with a comprehensive soil test to identify the specific pollutants and their concentrations. Once the baseline is established, the garden layout is designed to maximize the contact between plant roots and the contaminated soil. Grading is the first physical step. Using a Skid Steer or a Hand Shovel, the site must be shaped to manage runoff. Installing Silt Fences or Berms during this phase is essential to contain any disturbed soil. After grading, the focus shifts to soil preparation. In many cases, the addition of Organic Compost and Mycorrhizal Fungi is necessary to jumpstart the microbial communities that assist the plants in breaking down complex hydrocarbons.
Edging provides a clean transition between remediation zones and aesthetic lawn areas. Using Steel Edging or Pressure Treated Timbers can help define these boundaries. Once the layout is set, the installation of hyperaccumulating plants like Sunflowers or Indian Mustard follows. A thick layer of Hardwood Mulch, approximately 3 inches deep, should be applied around the base of these plants. This mulch layer serves multiple functions: it retains moisture, suppresses weeds that might compete for nutrients, and prevents dust from blowing contaminated particles into the air. For long term stabilization, Poplar Trees or Willow Trees are planted in areas with high groundwater to act as natural pumps, drawing tainted water up and through their root systems where microbes can go to work.
Common Landscaping Failures
One of the most frequent failures in remediation landscaping is poor drainage planning. If water is allowed to stagnate, it can create anaerobic conditions that kill beneficial microbes and cause root rot in the very plants tasked with cleaning the site. Another common mistake is soil compaction. Heavy equipment used during the construction phase can crush the soil structure, leaving it dense and impenetrable. Roots cannot thrive in compacted earth, and without root penetration, Bio-remediation Basics cannot be applied effectively. Using a Broadfork or Aerator to loosen the soil before planting is a vital corrective step.
Improper spacing is another pitfall. Gardeners often plant too densely, hoping for a quicker result. However, overcrowding leads to competition for light and nutrients, resulting in weak plants that lack the vigor to process soil toxins. Furthermore, many property owners fail to account for the harvest. In phytoextraction, the plants actually absorb the heavy metals into their tissues. If these plants are left to die and decompose on the site, the toxins return to the soil. The biomass must be harvested and disposed of properly at a hazardous waste facility. Finally, irrigation inefficiencies, such as using high pressure sprayers that erode the soil surface, can spread contaminants to previously clean areas of the yard.
Seasonal Maintenance
Landscape management on a remediation site is a year round commitment that changes with the seasons. In the spring, the focus is on soil activation and new plantings. This is the time to apply Slow Release Fertilizers and check the pH levels of the soil. As the weather warms in the summer, irrigation becomes the priority. Monitoring the soil moisture at a 6 inch depth ensures that the plants remain healthy enough to continue the extraction process during the peak growing season. This is also the time when rapid growers like Sunflowers will require the most attention and potentially some structural support.
Autumn marks the most critical phase of the remediation cycle: the harvest. As hyperaccumulating annuals reach the end of their life cycle, they must be removed, roots and all. Using Pruning Shears and Gas Powered Trimmers, the biomass is collected and bagged for off site disposal. During the winter, the soil should not be left bare. Planting a cover crop like Winter Rye or applying a fresh layer of Wood Chips prevents wind and water erosion from stripping away the topsoil. For perennial species like Willow, winter is the ideal time for structural pruning to encourage vigorous new growth in the coming spring.
Professional Landscaping FAQ
What exactly are Bio-remediation Basics?
It is the use of microorganisms or plants to return an environment altered by contaminants to its original state. In landscaping, this specifically refers to using vegetation to extract, stabilize, or destroy soil toxins like lead or oil.
How long does the soil cleaning process take?
The timeline varies significantly based on the level of contamination and the plant species used. Generally, a noticeable reduction in soil toxins takes between 2 to 5 growing seasons of consistent planting and harvesting.
Are the plants used in remediation safe to touch?
Most remediation plants are safe to handle, but you should never consume them. It is best practice to wear Nitrile Gloves when pruning or harvesting plants known to be absorbing heavy metals from the soil.
Can I grow vegetables alongside remediation plants?
It is not recommended to grow edible crops in the same soil during the remediation phase. Use Raised Garden Beds with imported clean soil and a Geotextile Fabric barrier if you wish to grow food simultaneously.
Does bio-remediation work for all types of soil pollution?
It is highly effective for heavy metals, petroleum, and many pesticides. However, very high concentrations of toxins may kill the plants before they can work. In these extreme cases, traditional soil removal might be the only option.