
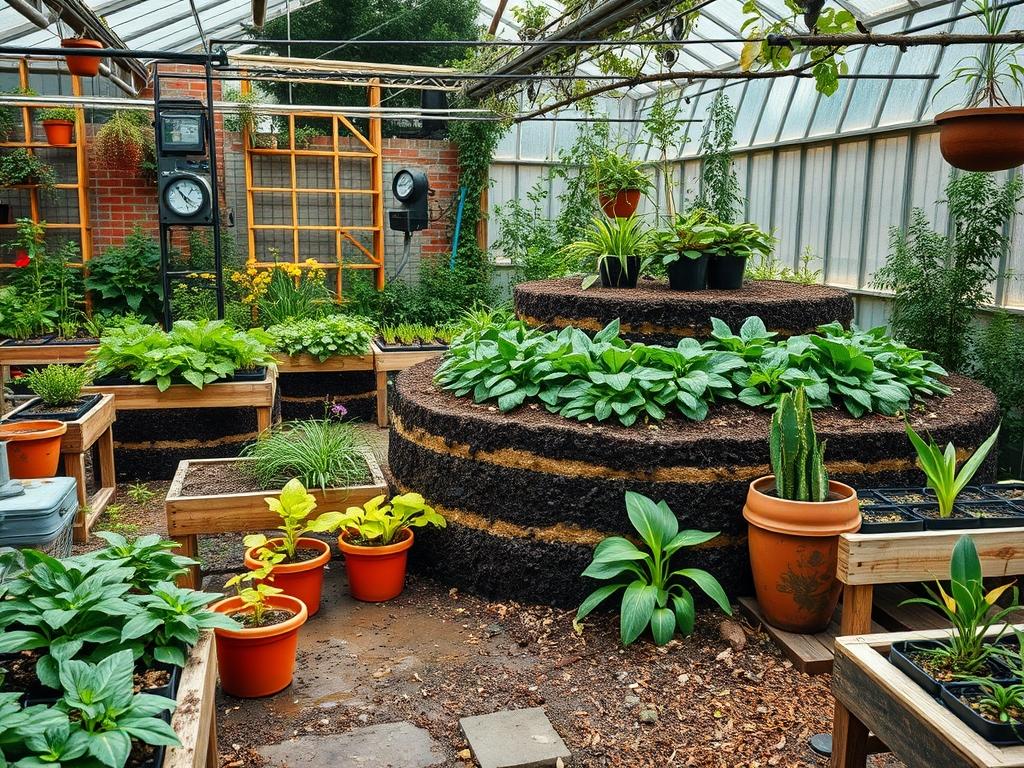
Proper landscaping requires a sophisticated balance between aesthetic appeal and ecological function. In many residential and commercial environments, the primary challenge involves managing poor soil quality and erratic rainfall patterns. Traditional flat-bed gardening often relies on excessive external inputs like synthetic fertilizers and frequent irrigation. This approach is neither sustainable nor cost effective over the long term. As a landscape architect, my goal is to design systems that mimic natural cycles while enhancing curb appeal. This is where the concept of a mounded garden bed, or Hügelkultur, becomes an essential tool for the modern designer. By utilizing vertical space and buried biomass, we can create productive focal points that require minimal maintenance after the initial establishing phase.
The functionality of your outdoor space depends on how well the design manages water and nutrients. In regions with heavy clay or sandy soils, traditional planting can lead to root rot or rapid dehydration. Hügelkultur addresses these concerns by creating a self-watering, self-fertilizing sponge within the landscape. Beyond the utilitarian benefits, these mounds introduce dramatic elevation changes that break up the visual monotony of a flat yard. When executed with precision, these structures act as functional sculptures that support local biodiversity and provide a lush, multi-layered privacy screen. Understanding the specific Hügelkultur Layering Tips and Ratios is the difference between a heap of rotting wood and a thriving, professional-grade garden ecosystem.
Landscape Design Principles
Effective landscape design relies on the principles of symmetry and focal points to guide the eye through the environment. A Hügelkultur bed serves as a natural focal point due to its height, which can range from 3 feet to 6 feet depending on the site requirements. To maintain visual balance, designers often place these mounds at the perimeter of a property to act as a retaining wall substitution or in a central location to create a “keyhole” garden layout. The elevation layer provided by the mound allows for tiered planting, where taller species occupy the center peak and cascading varieties flow down the slopes.
Irrigation planning must be integrated into the mound’s geometry. While the decaying wood inside the mound will eventually store massive amounts of moisture, the initial setup requires carefully placed Drip Irrigation or Soaker Hoses along the top ridge. Walkways should be designed to wrap around the mounds, using materials like Crushed Limestone or Wood Chips to define the space. These paths prevent soil compaction, ensuring that the air pockets necessary for wood decomposition remain intact. By layering height and texture, the designer creates a sense of depth that makes even small backyards feel more expansive and purposeful.
Plant and Material Selection
Choosing the right materials is the cornerstone of a successful installation. Choosing the wrong wood or plant species can stall the nitrogen cycle and lead to poor growth. The following table outlines optimal choices for both the internal structure and the external planting.
| Plant Type | Sun Exposure | Soil Needs | Water Demand | Growth Speed | Maintenance Level |
| :— | :— | :— | :— | :— | :— |
| Butternut Squash | Full Sun | Rich Organic | Moderate | Fast | Low |
| Blueberry Bushes | Partial/Full | Acidic | High | Medium | Medium |
| Comfrey | Partial | Any | Low | Very Fast | Low |
| Strawberries | Full Sun | Well Draining | Moderate | Medium | Medium |
| Rosemary | Full Sun | Sandy/Loam | Low | Medium | Low |
| Elderberry | Partial Sun | Moist/Rich | High | Fast | Low |
For the internal core of the mound, focus on Hardwood Logs such as Oak, Maple, or Birch. These woods decay slowly, providing a steady release of nutrients over twenty years. Softwoods like Pine or Spruce are acceptable but will decompose much faster and may temporarily acidify the soil. Avoid Black Walnut or Cedar, as these contain natural chemicals that can inhibit the growth of surrounding plants.
Implementation Strategy
The process begins with proper site grading to ensure that water does not pool at the base of the structure. I recommend excavating a trench approximately 12 inches deep. This allows the largest Hardwood Logs to sit below the frost line, anchoring the mound and providing a stable foundation. Use a Spade or Mini-Excavator to clear the area, making sure the length of the trench runs perpendicular to any significant slope to catch runoff.
Once the trench is ready, the layering begins with a focus on specific volume ratios. The base should be composed of 40 percent heavy logs, which form the primary carbon source. Stack these tightly to minimize large voids. The second layer consisting of 20 percent smaller branches and twigs fills the gaps between the logs. This is followed by a 20 percent nitrogen layer, which includes Fresh Grass Clippings, Green Leaves, or Kitchen Scraps. This nitrogen is critical because it prevents the carbon-rich wood from robbing the soil of nutrients as it begins to break down.
The final 20 percent of the mound consists of a mixture of Aged Manure, Compost, and Topsoil. Aim for a total soil depth of at least 6 inches over the entire surface. Finally, apply a heavy layer of Straw or Wood Chip Mulch to regulate temperature. If the slope of the mound is steeper than 45 degrees, use Edging Materials like large stones or woven willow branches to prevent erosion during the first few rain cycles. This structured approach ensures the internal pile reaches the correct internal temperature for microbial activity.
Common Landscaping Failures
The most frequent mistake in Hügelkultur construction is insufficient nitrogen buffering. If a designer uses too much wood and not enough “green” material, the soil will become nitrogen-deficient, causing plants to turn yellow and stunt. To avoid this, always monitor the ratio of brown to green materials. Another issue is improper spacing. As the wood decays, the mound will naturally settle and shrink; if plants are placed too closely together during the first season, they may become overcrowded or their roots may be exposed as the earth shifts.
Drainage mistakes can also devastate a project. If the mound is built in a low-lying area without a proper French Drain or gravel base, the bottom logs may become anaerobic, smelling of sulfur and killing beneficial fungi. Soil compaction is another silent killer. Never step on the mound itself. Use a Long-Handled Hoe or Reach Tool for maintenance to keep the soil structure loose and porous. Finally, failing to account for wind can dry out the mound’s upper reaches. In windy or arid climates, the height of the mound should be slightly lower, or windbreaks should be installed to protect the delicate topsoil.
Seasonal Maintenance
Seasonal management begins in the spring with a thorough inspection for settling. If the mound has slumped significantly, add a fresh layer of Compost and Topsoil before the primary planting season begins. This is also the time to check your Irrigation Systems for leaks. As the weather warms, the microbial activity inside the mound increases, which may require more frequent watering until the internal wood is fully saturated.
During the summer, the primary task is moisture management. Even though Hügelkultur is designed to be self-sustaining, young mounds in their first three years still need supplemental water during heatwaves. In the autumn, do not remove the spent plant material. Instead, chop the foliage and leave it on the surface of the mound to act as a natural mulch. This mimics the forest floor and returns nutrients to the system. Winter maintenance is minimal, though it is wise to add a 2-inch layer of Mulch to protect the internal fungal networks from extreme freezing and thawing cycles.
Professional Landscaping FAQ
What is the best type of wood to use for the base?
Hardwoods like Oak, Maple, and Apple are the gold standard for foundational layering. They decompose slowly, providing decades of nutrient release and superior water retention compared to softwoods. Avoid allelopathic woods like Black Walnut that can stun plant growth.
How often do I need to water a Hügelkultur mound?
During the first two seasons, treat it like a traditional garden and water when the top two inches of soil feel dry. Once established, the rotting wood acts as a reservoir, and you may only need to water during prolonged droughts.
Can I build these mounds on a steep hill?
Yes, but you must build them on contour. This means the mounds should follow the horizontal lines of the slope to act as a swale. This catches runoff and prevents erosion, turning a difficult hillside into a productive growing space.
Will the mound attract pests or rodents?
If you pack the logs and branches tightly and fill the gaps with soil, you minimize the “caves” that rodents prefer. Domestic pets or active gardening generally keep pests away, and the increased biodiversity often brings in natural predators like snakes or hawks.
How much will the mound shrink over time?
Expect a height reduction of about 20 percent to 30 percent over the first five years as the wood collapses and the organic matter turns into humus. You can maintain the height by adding Mulch and Compost to the top annually.