
Successful landscape architecture requires a delicate balance between aesthetic vision and biological performance. While we often prioritize hardscape materials and structural focal points, the vitality of a residential site depends entirely on the health of its soil. For professionals seeking rapid improvements in plant vigor and curb appeal, understanding hot composting basics is a fundamental skill. This method is not merely a way to manage garden waste; it is a sophisticated aerobic process that accelerates decomposition through high temperatures. By maintaining internal heat between 135 degrees Fahrenheit and 160 degrees Fahrenheit, you can transform raw organic matter into nutrient dense humus in as little as four to eight rolls of the calendar week. This capability allows a project to become self sustaining, reducing the need for imported fertilizers while ensuring that new installations have the biological support they need to thrive in a competitive environment.
Landscape Design Principles
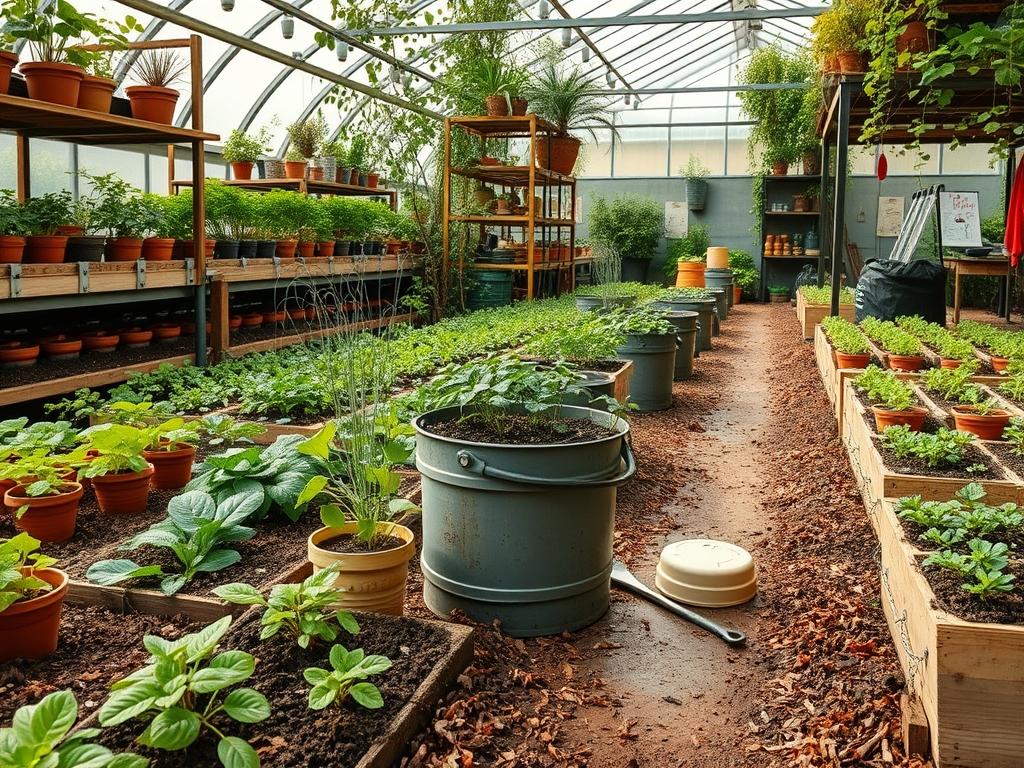
Integrating a functional composting system into a master landscape plan requires more than just tucking a bin into a hidden corner. We must apply the same design principles of symmetry and visual balance to the utility zones as we do to the formal gardens. When planning the site, consider the compost station as a vital piece of the irrigation and maintenance infrastructure. It should be located on a level surface with excellent drainage to prevent leachate from pooling. If the property has significant elevation changes, place the composting area on a mid level terrace. This positioning ensures that heavy carts of finished material can be moved downhill to lower garden beds, reducing physical strain and improving operational efficiency.
Focal points within the garden can often be supported by the placement of the composting site. For example, a three bin system constructed from high quality Western Red Cedar or Recycled Composite Timber can serve as a structural backdrop for a perennial border. Using layers of elevation, such as a low Retaining Wall made of Natural Fieldstone, can help define the utility zone while masking the practical elements from the main view of the house. Walkways leading to the composting area should be at least 36 inches wide to accommodate a standard Wheelbarrow. Utilizing durable materials like Crushed Granite or Permeable Pavers for these paths ensures that the area remains accessible during wet seasons without becoming a muddy eyesore.
Plant and Material Selection
The following table highlights plant species that benefit most from the rapid nutrient release provided by hot compost. These selections are chosen for their high performance in professional landscapes and their ability to anchor a design.
| Plant Type | Sun Exposure | Soil Needs | Water Demand | Growth Speed | Maintenance Level |
| :— | :— | :— | :— | :— | :— |
| Hydrangea macrophylla | Part Shade | Rich, Moist | High | Fast | Moderate |
| Fagus sylvatica | Full Sun | Well Dained | Medium | Slow | Low |
| Miscanthus sinensis | Full Sun | Adaptable | Low | Fast | Low |
| Syringa vulgaris | Full Sun | Neutral pH | Medium | Moderate | Moderate |
| Heuchera villosa | Shade | Humus Rich | Medium | Moderate | Low |
| Liriodendron tulipifera| Full Sun | Deep, Fertile | High | Very Fast | High |
In addition to the plants themselves, the materials used for hot composting must be carefully selected to maintain the internal furnace. Successful hot composting basics rely on a carbon to nitrogen ratio of roughly thirty to one. Your “browns” or carbon sources should include Double Shredded Hardwood Bark, Dried Straw, and Corrugated Cardboard. Your “greens” or nitrogen sources include Fresh Grass Clippings, Vegetable Scraps, and Spent Annuals. The physical structure of the pile is maintained by using coarser materials at the base to facilitate airflow, which is critical for the aerobic bacteria that generate heat.
Implementation Strategy
The process begins with the physical layout of the compost pile, which must be large enough to insulate its own heat. A minimum volume of 1 cubic yard, or a 3 foot by 3 foot by 3 foot cube, is required to reach the necessary temperatures. Start by grading the area to ensure it has a 1 percent to 2 percent slope away from the house foundation or any nearby water features. Lay down a 6 inch base of coarse material like Wood Chips or small branches to encourage oxygen to enter from the bottom.
Layer your green and brown materials like a lasagna, ensuring each layer is roughly 3 to 4 inches thick. As you build the pile, use a Garden Hose to mist each layer. The pile should feel like a wrung out sponge; damp to the touch but not dripping. Once the pile reaches its full volume, use a Compost Thermometer with a 24 inch probe to monitor the internal core. After the temperature peaks and begins to drop, typically after three to five days, use a Pitchfork to turn the outer material into the center. This infusion of fresh oxygen restarts the microbial activity.
Edging around the composting area should consist of Steel Edging or Pressure Treated Timber to keep the footprint contained and professional. If the site is prone to heavy rains, consider a simple roof structure or a heavy duty Canvas Tarp to prevent the pile from becoming waterlogged. Proper drainage around the site is essential; a small French Drain filled with 1 inch River Rock can divert excess runoff away from the composting zone and into a designated rain garden or dry creek bed.
Common Landscaping Failures
The most frequent mistake in managing these systems is a failure to account for drainage and aeration. If a pile becomes too wet, it turns anaerobic, producing foul odors and slowing the decomposition process to a crawl. This is often caused by placing the bin in a low spot where water collects or by using too many wet green materials without sufficient structural carbon. Another common failure is improper spacing of the bins. If the units are too close to Native Plants or sensitive trees, the heat and concentrated nutrients can actually damage the root systems of the existing flora.
Soil compaction is another critical issue that occurs when the composting area is not properly defined. Frequent foot traffic or heavy machinery near the piles can crush the soil structure, preventing the very oxygen exchange that the compost is meant to facilitate. Furthermore, irrigation inefficiencies often plague these zones. If the compost becomes bone dry, the microbial population will die off, and the pile will sit dormant. Using a dedicated Drip Irrigation line for the compost bins can automate the moisture management and ensure consistent results throughout the peak of the growing season.
Seasonal Maintenance
Landscape management is a year round commitment, and the composting process must adapt to the changing climate. In the spring, focus on harvesting the finished compost from the previous year. Apply a 2 inch layer of compost as a top dressing to your ornamental beds before applying a final layer of Decorative Mulch. This provides a slow release nutrient source as the ground warms up. During the summer, the primary challenge is moisture retention. High evaporation rates mean you must check the pile frequently and potentially turn it more often to prevent the core from overheating and stalling.
In the autumn, you will have an abundance of carbon materials such as fallen leaves. Use a Mulching Mower to shred these leaves before adding them to the pile; this increases the surface area for bacteria to work on and prevents the leaves from matting together. As winter approaches, insulation becomes the priority. If you live in a climate with hard freezes, pile your materials higher or wrap the bin in Burlap or Foam Insulation Boards to retain as much internal heat as possible. While the process will slow down in the cold, a well constructed pile can continue to cook through the winter months.
Professional Landscaping FAQ
How often should I turn a hot compost pile?
For the fastest results, turn the pile every three to five days once the internal temperature reaches 135 degrees. This introduces fresh oxygen and moves undecomposed outer materials into the high heat core of the pile for consistent processing.
What is the ideal ratio for hot composting basics?
Aim for a volume ratio of roughly two parts brown material like Dead Leaves to one part green material like Grass Clippings. This creates the optimal chemical balance for thermophilic bacteria to break down organic matter rapidly without odors.
Can I include weeds in a hot compost pile?
Yes, provided the pile consistently reaches temperatures above 145 degrees Fahrenheit. This heat is sufficient to kill most weed seeds and pathogens, allowing you to recycle garden waste into clean, nutrient rich soil amendment for future landscape installations.
Why does my compost pile smell like ammonia?
An ammonia smell indicates an excess of nitrogen. To fix this, use a Pitchfork to mix in more carbon rich materials such as Shredded Cardboard or Straw. This balances the chemistry and allows the aerobic bacteria to regain control.
How do I know when the compost is ready?
Finished compost should be dark, crumbly, and have an earthy aroma. The original materials should no longer be recognizable. It will also fail to generate significant heat after turning, indicating that the intensive microbial breakdown phase is complete.